This article explains the process of creating a room with SpaceCE.
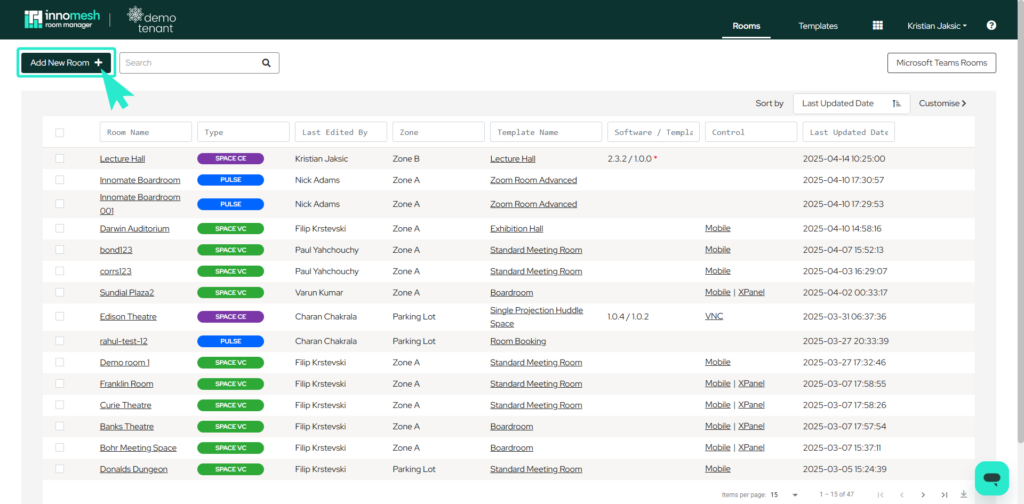
To create a new room, navigate to the Innomesh home page and click on the “Add New Room” button shown below.
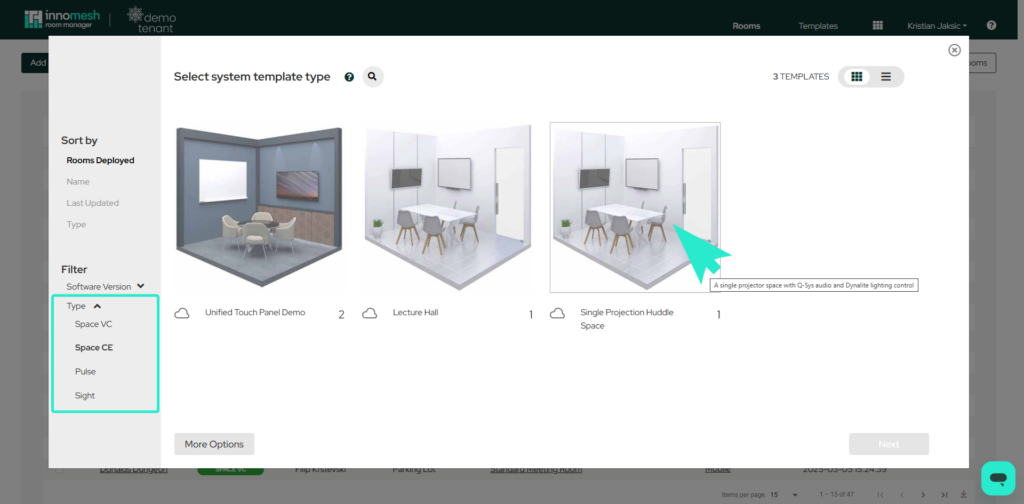
A template must now be selected that suits your requirements. Once a viable one has been selected, click “Next” in the bottom right corner of the window.
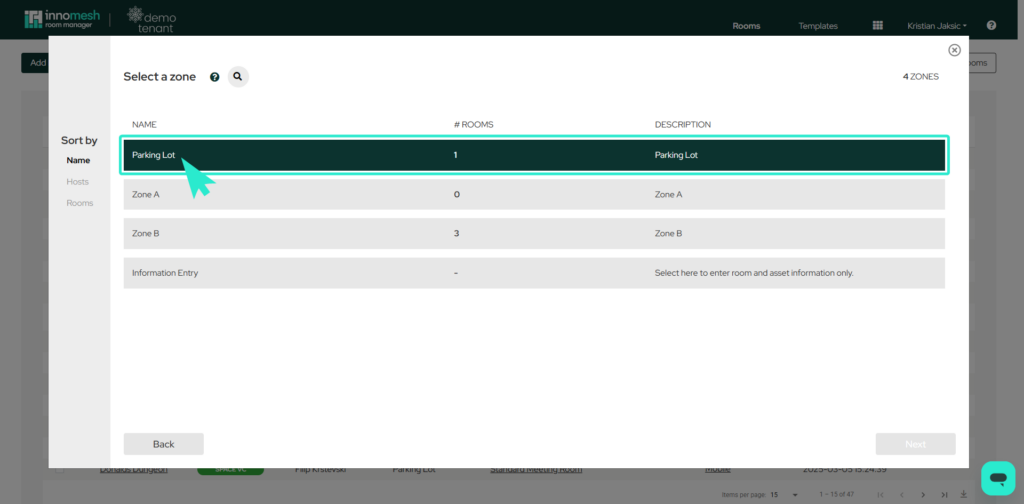
The next step is to select the Zone where you want to set your room up. Note that you have the ability to move the room across to a different zone after creation, so the best practice is to stand a room in a zone that is used for testing purposes first before moving it to the production environment.
For more information about Zones, see the Innomesh Administration page here.
Select from the list of Zones and click “Next” in the bottom right corner of the window.
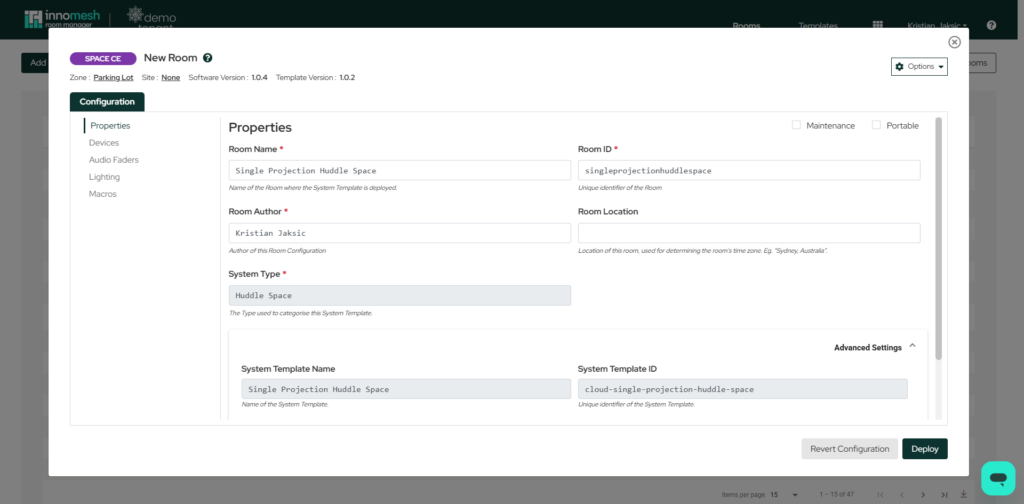
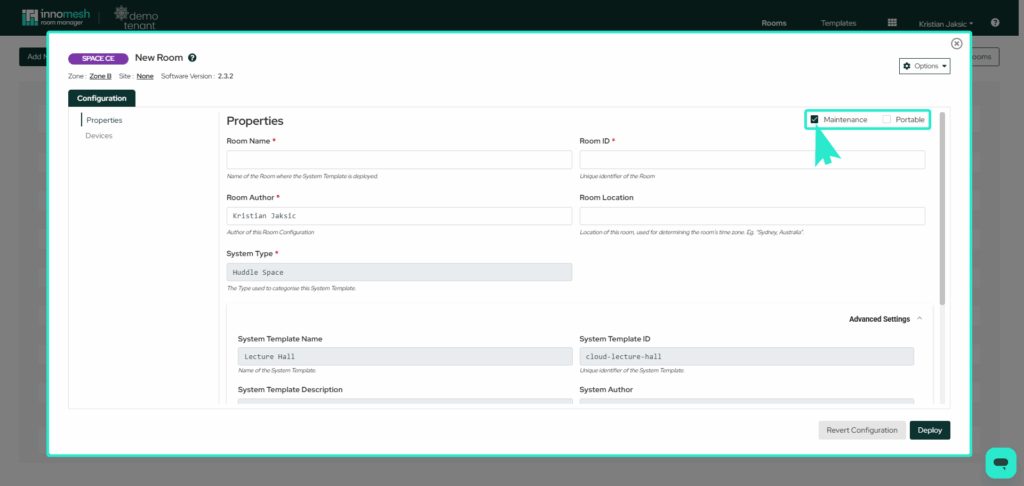
Properties
The room creation process has begun. The Room Name, Room Repository Name, and Room Author fields must now be populated.
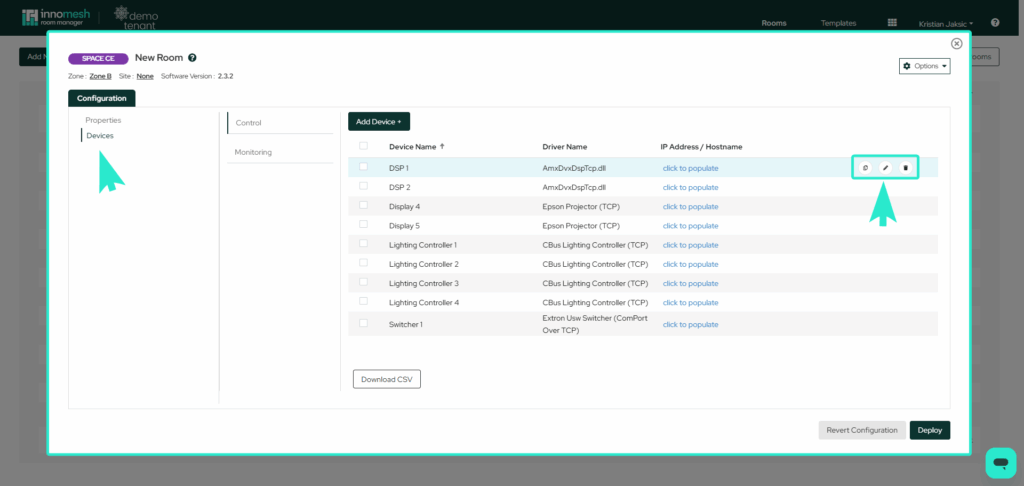
Devices
The devices information must now be populated.
Native
The first devices that need to be populated are the Crestron ‘Native’ devices. This information has been pulled from the template, so the IPIDs of the devices are already populated. If this information is correct, the process can continue. Otherwise, each device can be edited, duplicated or deleted by hovering over the device and clicking on the icons.
It is preferable to disable a device that is inherited from the template, rather than deleting as this may cause unforseen issues.
To change any of the above fields, or disable the device, click on the pencil icon highlighted above, and edit the device.
IP
This section allows you to populate IP device Hostname/IP addresses. To do so, click on the “Click to Populate” button.
The device can be duplicated, edited and deleted by clicking on the icons to the right of the IP address.
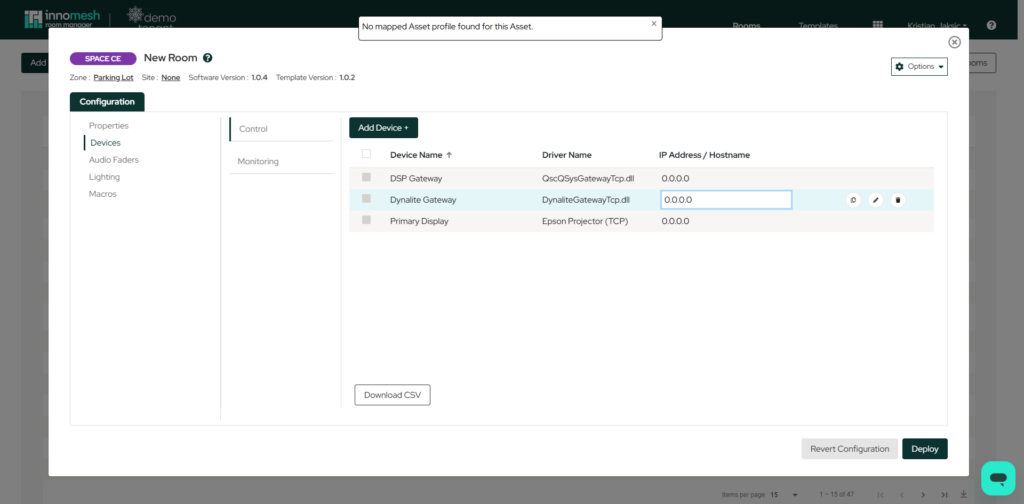
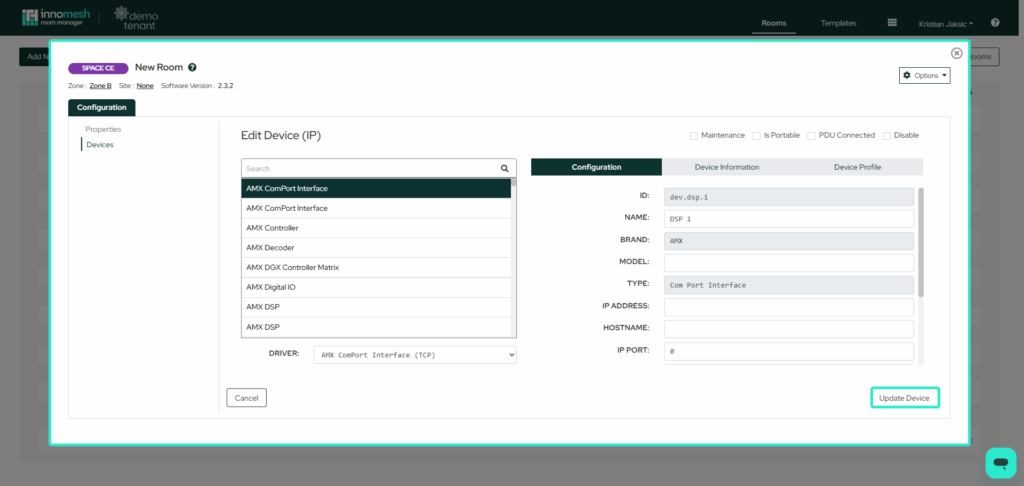
To change any of the above fields, or disable the device, click on the pencil icon highlighted above, and edit the device.
Dropdown Menu
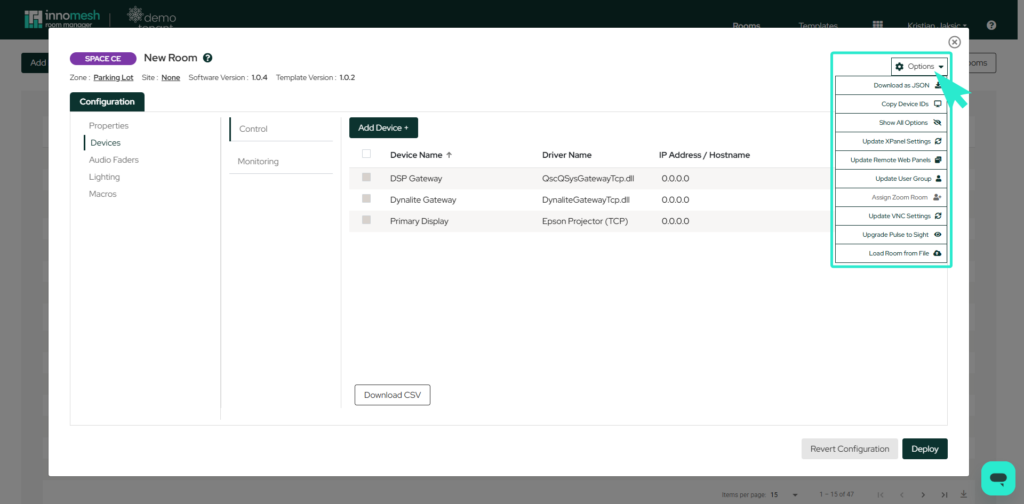
You may also have noticed the options dropdown menu on the top right, which provides access to several useful features for the current Space CE room.
- Download as JSON: Downloads the current Space CE room’s settings as a .json file. A .json file will immediately download and contain fields respective to your Space CE room.
- Copy Device IDs: Provides the option to copy a particular device ID of a device linked to the current Space CE room. A dropdown menu will appear with a list of devices connected to the current Space CE room, and will copy the device ID to your clipboard of the device that you select. You will also see a notification on your screen to notify you that this device ID has been copied to your clipboard.
- Show All Options: Displays an extended range of configuration options for the current Space CE room. Please be mindful that future configuration updates from the current room’s template will no longer update the current Space CE room if this option is selected.
- Update XPanel Settings: “Update XPanel Settings” allows users to configure XPanels within a Space CE Room, provided that XPanels are already enabled. This option will only appear in the Options drop-down menu if at least one XPanel is active.____
- Update Remote Web Panels: Opens a pop-up window that allows users to manage and configure remote web panel entries. Clicking “Add” creates a new empty row labeled “click to populate” under each subheading.____
- Update User Group: “Update User Group” opens a pop-up window that lets you assign and select different user groups associated with each room. This feature allows for flexible configuration, enabling you to tailor user group settings to match your specific access and management preferences.____
- Update VNC Settings: Allows modifications to the Space CE room’s VNC settings, such as the creation of a new user interface that is to be available via VNC for the current room.
- Updates Pulse To Sight: “Upgrade Pulse to Sight” enhances the Pulse system by unlocking advanced query capabilities through additional user prompts. When selected, it presents two options: “Remove Sight,” which cancels the upgrade and reverts to the original state, and “Set Sight Speed Tier,” which allows users to increase the frequency at which Sight sends queries for faster performance and responsiveness.____
- Load Room from File: This option will allow you to load your custom template.
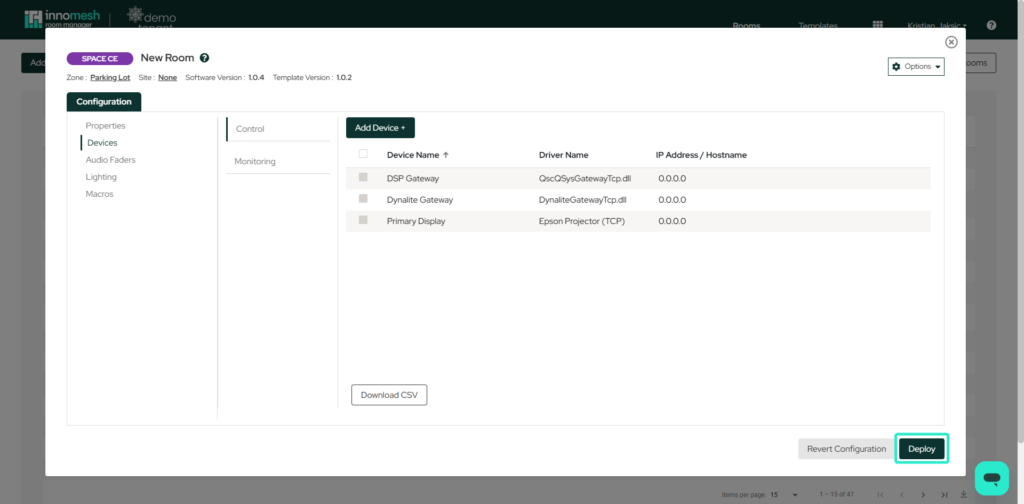
Once all the necessary information has been entered, the room can be created by clicking on the “Deploy” button in the bottom right corner of the window.