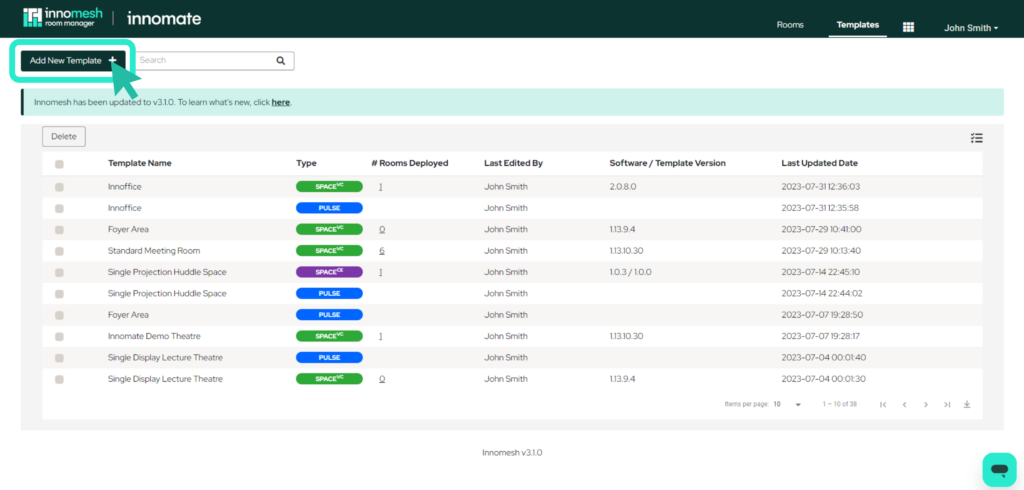
To create a new template, navigate to the Templates page by clicking on the “Templates” button on the top right of the Innomesh page. Then, click on the “Add New Template” button shown below.
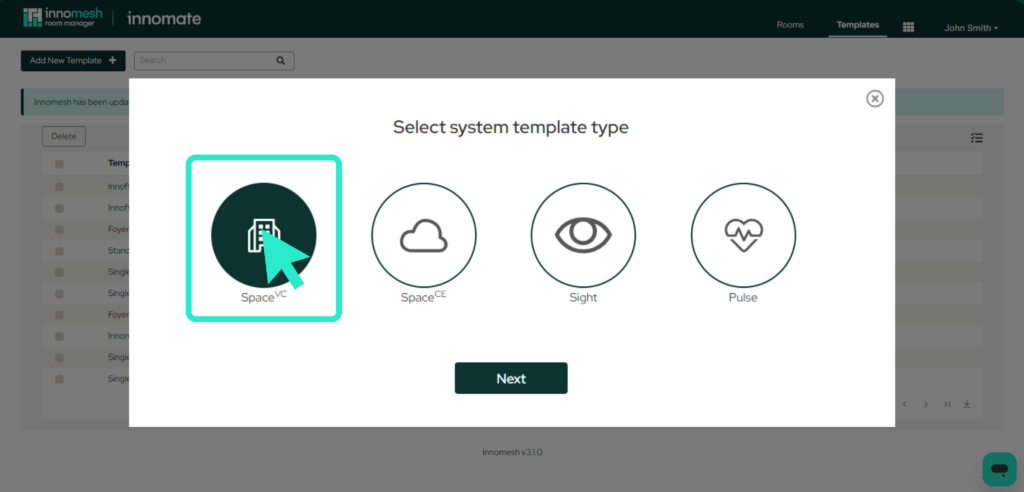
Select SpaceVC and click Next.
The next step is to add the attributes and values for the following as required.
- Properties
- Devices
- System
- User Interfaces
- AV Sources
- Audio Sources
- Destinations
- Device Controls
- Audio Conference
- Recorder
- Environmentals
- Room Link
- Automation
- Administration
- Macros
- Room Options
For information on the configuration of these elements, visit the Anatomy of a SpaceVC Template article here.
This is done by clicking the item from the list on the left hand side and then typing in the attributes.
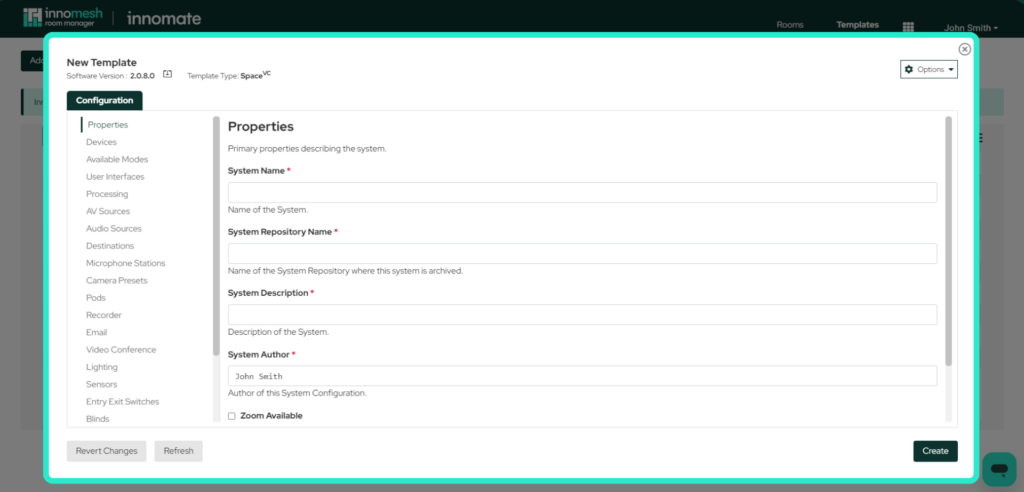
Properties, Devices, Macros and Room Options are common to all templates, the rest of the list depends on the software package that is used. Here you can define the sort of properties and functionality you would like this template to have.
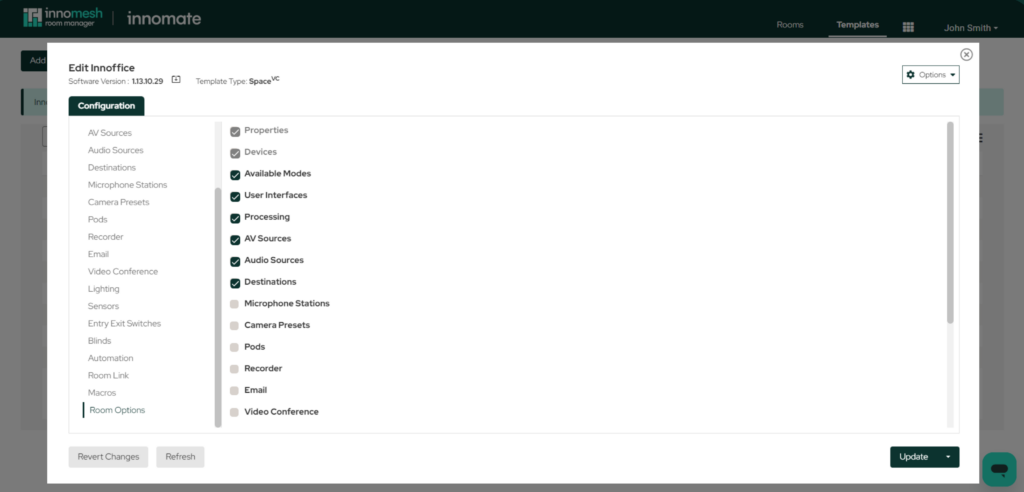
The last one in the list is “Room Options” and that is where you define the things from the list that you would like to manage at the room level. You can do that by checking items from the list. When managing the rooms users will only be able to see what you select here.
For more options about user permissions, please see this article here.
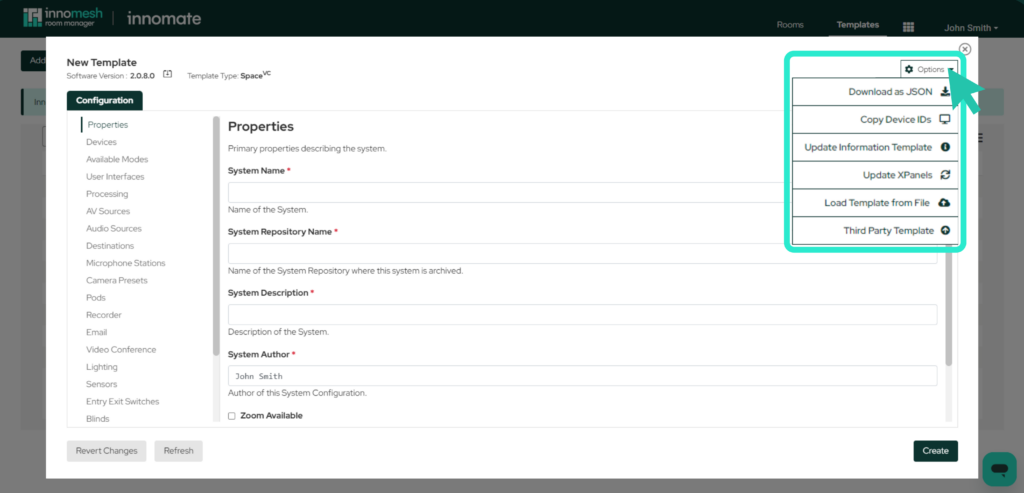
You may also have noticed the options dropdown menu on the top right, which provides access to several useful features for the current Space VC template.
- Download as JSON: Downloads the current Space VC template’s settings as a .json file. A .json file will immediately download and contain fields respective to your Space VC template.
- Copy Device IDs: Provides the option to copy a particular device ID of a device linked to the current Space VC template. A dropdown menu will appear with a list of devices connected to the current Space VC template, and will copy the device ID to your clipboard of the device that you select. You will also see a notification on your screen to notify you that this device ID has been copied to your clipboard.
- Update Information Template: This option will allow you edit or update the information templates.
- Update XPanels: Updates all XPanels which are connected to the current Space VC template, as XPanels will not receive template changes automatically.
- Load Template from File: This option will allow you to load your custom template
- Third Party Template: This option will allow you to upload a Node.js package if you would like to test or run third-party code.
- Duplicate Template: Duplicates the current Space VC template, duplicating all customisation and settings made to the original template and assigning them to the new template.
- Delete Template: Space VC template can be deleted from the list of existing templates. Deleting a Space VC template is permanent so please be mindful before this template is deleted.
After all that information has been added, you can now click the “Create” button to finalise the creation of a template.