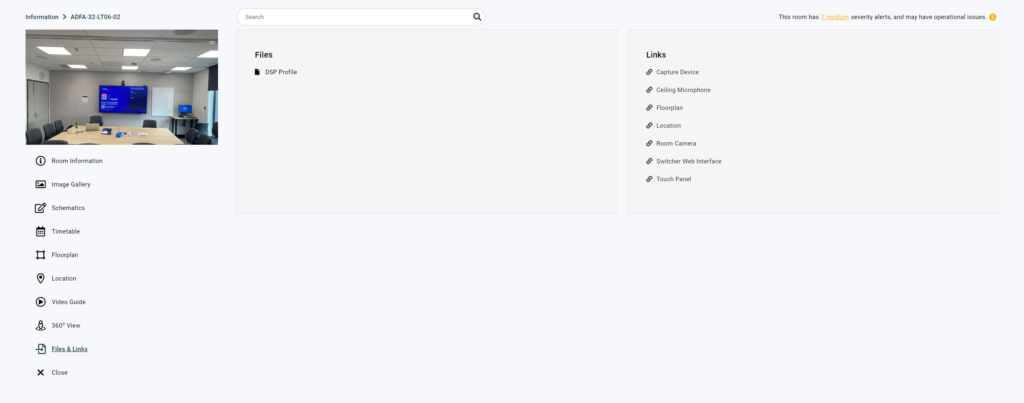
Overview
Room Information, redesigned for Innomesh V3.5.0, provides a view that enhances the presentation of data and display physical features of a room that config and data gathered from devices would never be able to provide, directly on the Innomesh Portal. This new experience includes an improved layout, an image gallery view, and in-browser views of schematics, timetables, maps, and other web links. The all-new Room Information View provides a single overview of a room, laid out in a logical format, with all pertinent room information and associated data available at a glance.
Room Information Walkthrough Video:
At a Glance
You can access the information page by choosing the “Information” tab on the Innomesh Portal. You can view the essential information and links for each room on this page.
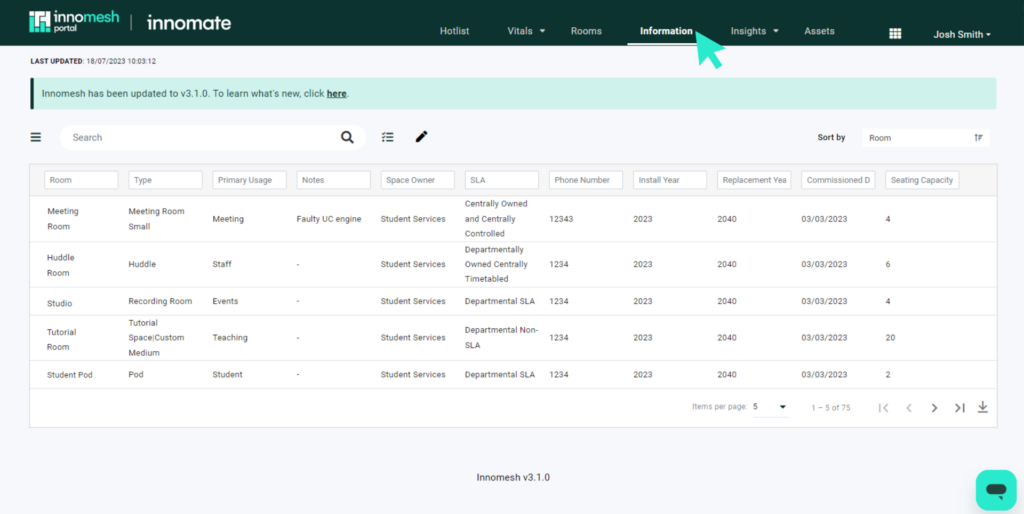
The page provides a list of rooms that can be filtered by the fields which have been defined within the AV Service Portal, which may include any heading or title you require like Room Name, Type, Primary Usage, Space Owner, SLA, Phone Number, etc.
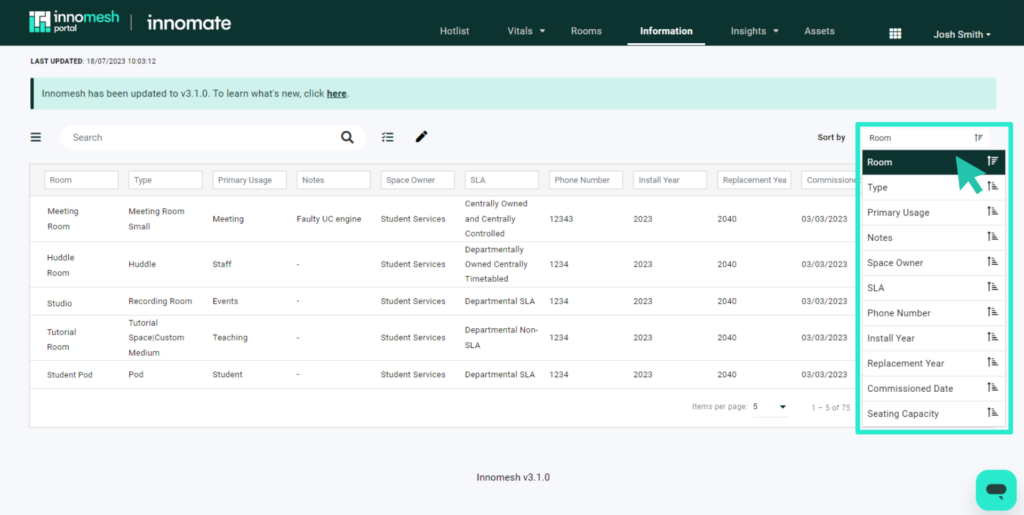
It is arranged in alphabetical order of name by default, however this can be adjusted in the ‘Sort By’ option in the top right – shown below.
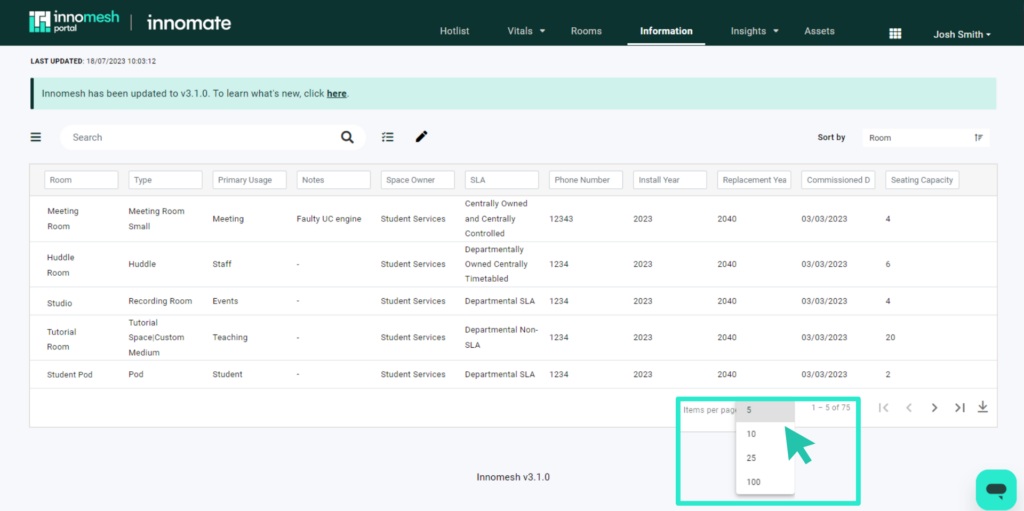
The number of rooms shown per page can also be adjusted, in this drop down shown below.
Downloading information
Users have the option to download information into a csv file for their own convenience and record keeping. To do this, click the download button on the bottom right of the page, as shown below.

Room Summary Views
Released as part of Innomesh V3.5.1The Smart Room Attributes, along with existing room information, can then be sorted into views using the “Summary Views” tab in the administration page, making it easy to compare, sort and evaluate rooms from the Information page. The individual summary views can be seen at the top of the Room Information table as tabs
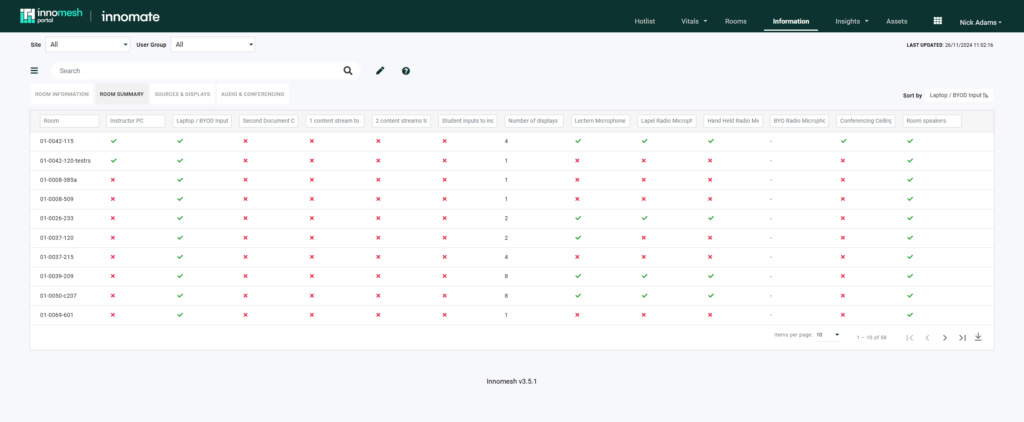
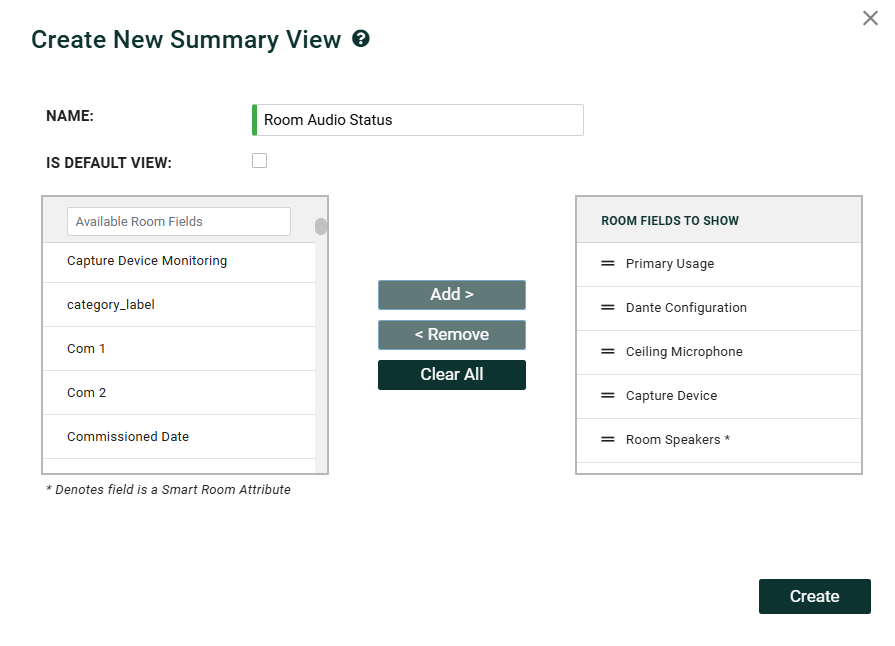
To create a summary view, go to Administration>Smart Room Attributes>Summary Views. Click on Create New, Give it a name and select the fields you would like to see on the Information page.
Room Information Detail
When you click on a room, the Innomesh Portal displays a comprehensive overview, presenting key room details alongside dynamic features like image galleries, schematics, and timetables. This centralized view organizes all relevant information, making it easy to access and manage room-specific data efficiently.
Pages:
Room Information Page
This is the landing page when a user clicks on a room from the list. This page displays the static room information defined for the room, and allows users to edit the information directly. This data can also be added via room manager by going to the room and selecting “Room Information”
The Room Information page serves as the landing page when a room is opened, providing users with an overview of the room’s static information. This page displays all predefined details about the room and allows users to edit this information directly within the Innomesh Portal.
Key Features:
- Static Room Information Display:
- Displays essential room details such as name, capacity, equipment, and user predefined attributes.
- Offers a clear, organized view for quick reference.
- Dynamic Room Informormation:
- Displays room infomrmation collected from sources other than manual data entry e.g: Data Import or Smart Room Attributes
- Not directly editable by the user
- May be referred to as dynamic room fields
- Direct Editing Capabilities:
- Users can update room details directly from this page, ensuring quick and efficient modifications.
- Integration with Room Manager:
- Alternatively, users can add or edit this data via the Room Manager by navigating to the desired room and selecting the Room Information tab.
Notes:
- Edits made in the Room Information page will sync with the data in the Room Manager, ensuring consistency across the platform.
- Ensure that users have the appropriate permissions to make edits directly from this page.
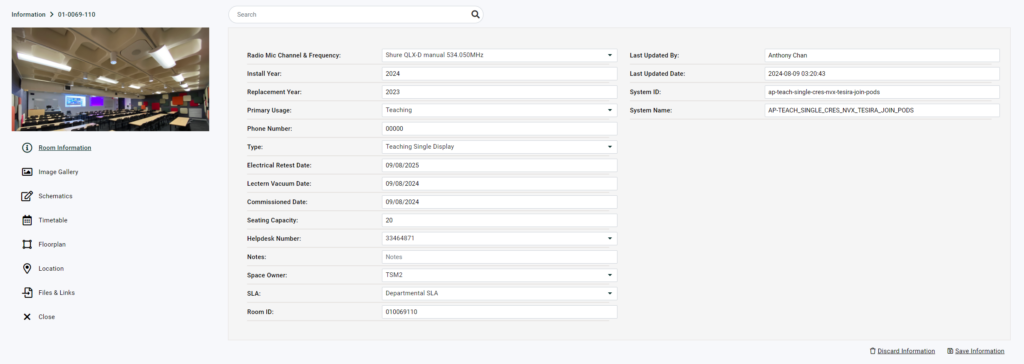
Image Gallery
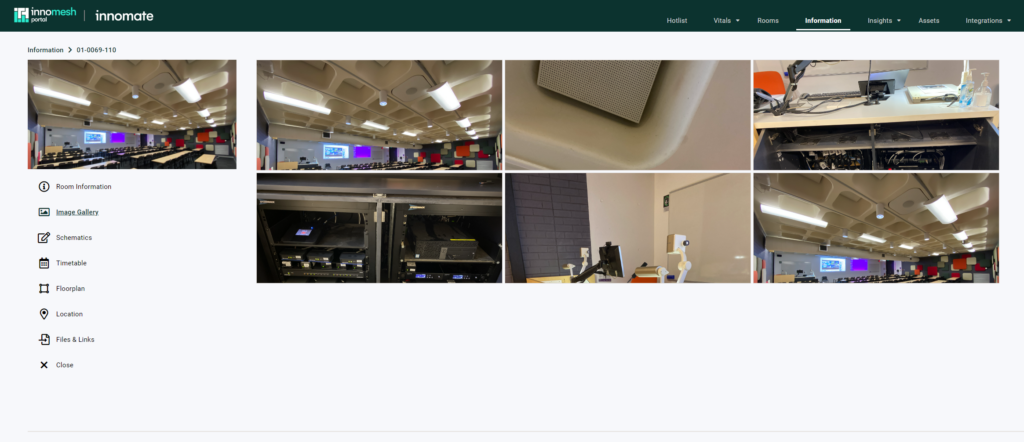
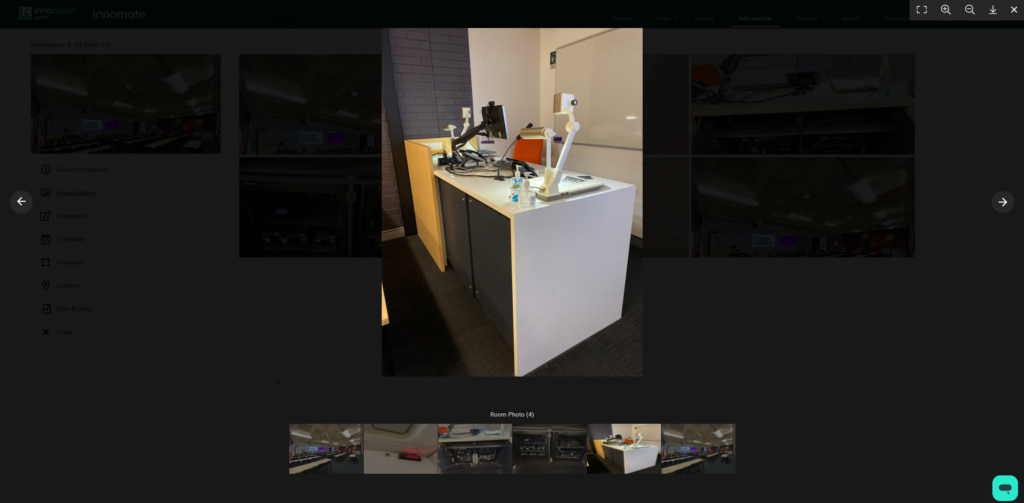
The Image Gallery page showcases all images associated with a room, offering an intuitive way to view visual content added to the room’s Room Information tab in the Room Manager.
Key Features:
- Grid View: Images are displayed in a clean, organized grid layout for easy browsing.
- Interactive Gallery: Clicking on any image opens it in a detailed gallery view with the following capabilities:
- Zoom: Enlarge the image to examine details more closely.
- Scroll Navigation: Move left or right to view other images in the gallery seamlessly.
Adding Images to the Gallery
- Open the Room Manager in the Innomesh Portal.
- Navigate to the desired room and go to the Room Information tab.
- Upload images directly to the appropriate fields.
- Supported formats include JPG, PNG, and GIF.
- Save changes to ensure the images are displayed in the gallery.
Schematics
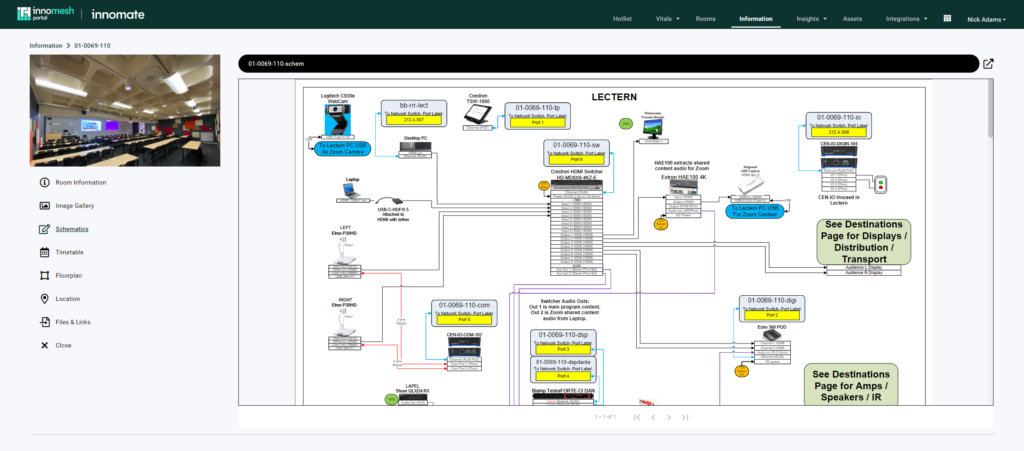
The Schematics page provides a dedicated view for room schematics, offering users a convenient way to access and interact with technical drawings or layouts associated with a room.
Key Features:
- Embedded View: Schematics are displayed directly within the webpage for easy viewing.
- Additional Options: Users can choose to open schematics in an external viewer or download them for offline use.
How to Configure the Schematics Page
- Open the Room Manager in the Innomesh Portal.
- Navigate to the room and locate the Room Information tab.
- Upload a file to a room field containing the text “schematic” in its name.
- Supported file formats include PDF and common image formats (e.g., JPG, PNG).
- Save the updates to ensure the schematic is accessible via the Schematics page.
Rendering Behavior
- The Innomesh Portal scans room fields for the keyword “schematic” to identify relevant files.
- Detected files are embedded directly within the Schematics page for immediate viewing.
- For files that require additional interaction or analysis, users can choose to open them externally or download them.
Notes:
- For best results, ensure schematics are clear, high-resolution, and appropriately formatted.
- Test the uploaded files to confirm they render correctly within the embedded view.
Timetable
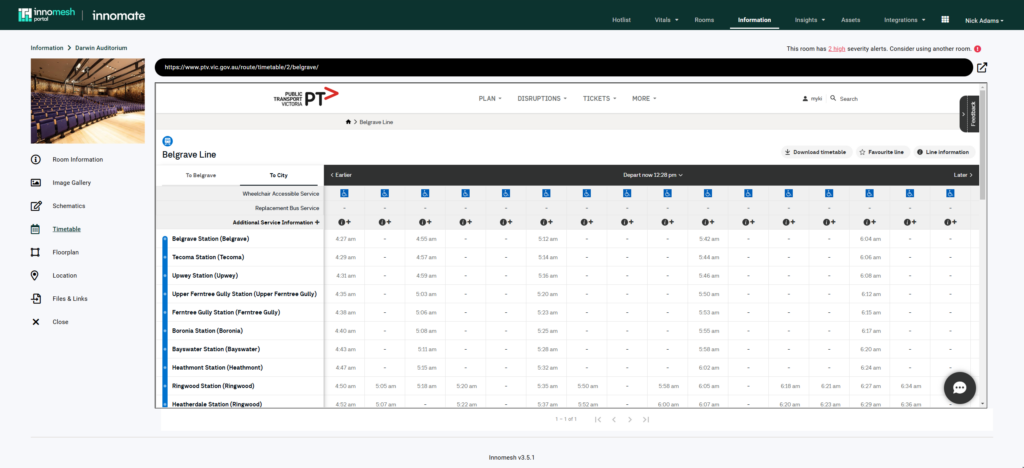
The Timetable page provides users with access to a room’s timetable, ensuring seamless scheduling visibility directly within the Innomesh Portal. This page is particularly useful for managing room availability and planned activities.
Key Features:
- Embedded View: If the referenced webpage supports embedding, the timetable is displayed directly within the Timetable page.
- Popup View: If embedding is not supported, clicking the link will open the timetable in a new popup window for easy access.
How to Configure the Timetable Page
- Open the Room Manager in the Innomesh Portal.
- Navigate to the room and locate the Room Information tab.
- Add a hyperlink to a room field containing either the text “timetable” or “schedule” in its name.
- Ensure the link points to a valid and accessible timetable webpage.
Floorplan
The Floorplan page provides a visual reference to the room’s floorplan, enhancing spatial understanding and navigation within the Innomesh Portal.
Key Features:
- Embedded View: Displays the floorplan directly within the Floorplan page if the linked webpage supports embedding.
- Popup View: Opens the floorplan in a new popup window if embedding is not supported.
How to Configure the Floorplan Page
- Open the Room Manager in the Innomesh Portal.
- Navigate to the room and locate the Room Information tab.
- Add a hyperlink to a room field containing the text “floorplan” in its name.
- Ensure the hyperlink directs to a valid and accessible floorplan webpage.
Rendering Behavior
- The Innomesh Portal scans room fields for the keyword “floorplan” to identify the relevant hyperlink.
- Based on the capabilities of the linked webpage:
- If embedding is supported, the floorplan is displayed directly within the portal.
- If embedding is not supported, the link opens in a separate popup window.
Location
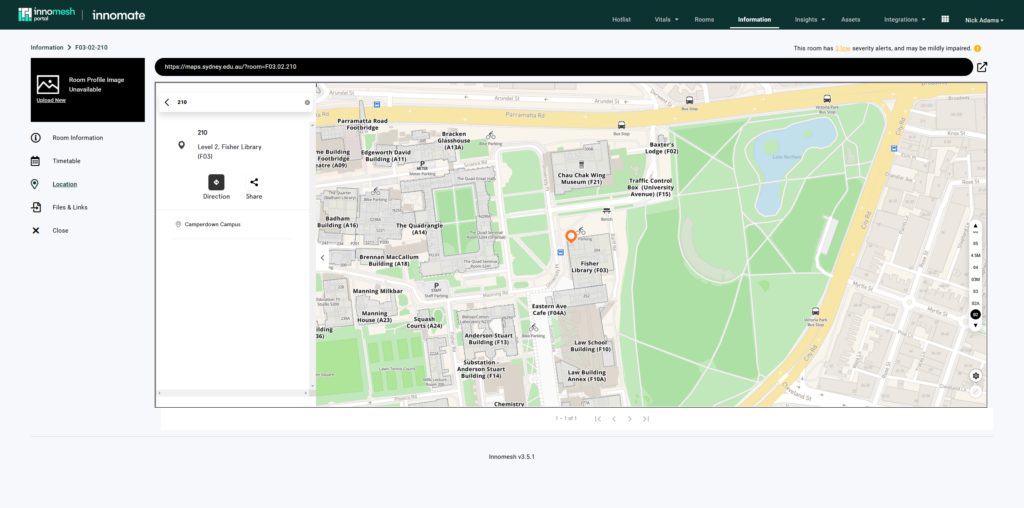
The Location page provides users with a link to the room’s location, enhancing accessibility and navigation for room management. This feature can display the location within the Innomesh Portal or open it in a separate popup window, depending on the embed capabilities of the linked webpage.
How to Configure the Location Page
- Open the Room Manager in the Innomesh Portal.
- Add a hyperlink to a room field containing “location” in its name.
- Ensure the hyperlink leads to a valid and accessible webpage.
Rendering the Location Page
- If embedding is not supported, clicking the link will open the webpage in a new tab
- The Innomesh Portal scans for hyperlink room fields labeled with “location” in their name.
- If the webpage allows embedding, the location will display directly within the Location page. With a button to open it in a new tab if required
Video Guide
The Video Guide page displays a video within the Room Information view, providing users with visual instructions or an overview specific to the room. This feature is particularly useful for training, setup guides, or showcasing room-specific functionality.
How to Configure the Video Guide
- Open the Room Manager in the Innomesh Portal.
- Add a video or hyperlink to a video in a room field with “video” in its name.
- Supported video formats: MP4, WebM, and Ogg.
- Hyperlinks must point to a hosted video file or streaming service.
360 View
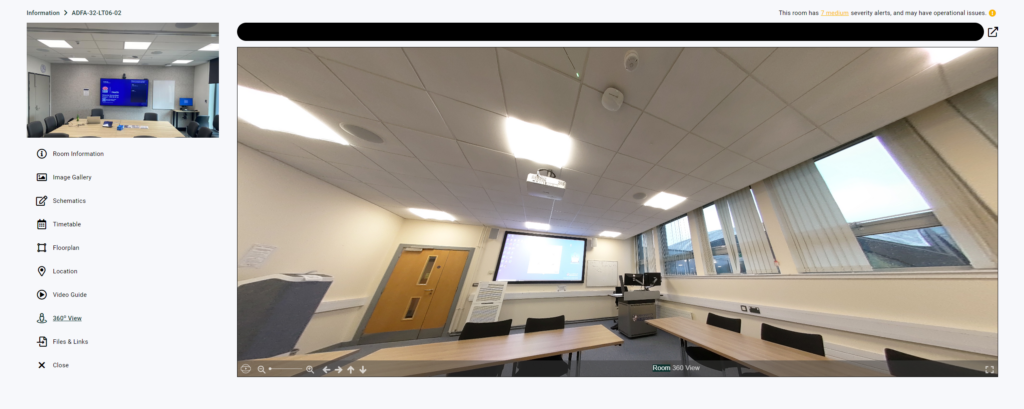
The 360 View page provides an interactive 360-degree photo of the room, allowing users to explore the space by “looking around.” This immersive view is particularly useful for gaining a comprehensive visual understanding of the room’s layout and setup.
To enable this feature:
- Navigate to the Room Manager.
- Upload a 360-degree photo to the Room 360 View field.
- Ensure the image is in a supported format (e.g., JPG or PNG) and has the appropriate dimensions for optimal display.
- Once uploaded, the 360-degree photo will render automatically on the 360 View page, accessible from the Room Information View.
Files & Links
The Files and Links page displays two separate lists: one for files and another for hyperlinks. These lists include all files and links associated with the room, including those utilized in other tabs. Additionally, you can store items here that may not be relevant to the other tabs but are still important for the room.
