This article aims to guide all environment holders in setting up new users and managing their permissions within the Portal and Room Manager environment. It specifically addresses the implementation of the Role-Based Access Control (RBAC) feature introduced in Innomesh version 3.3.0.
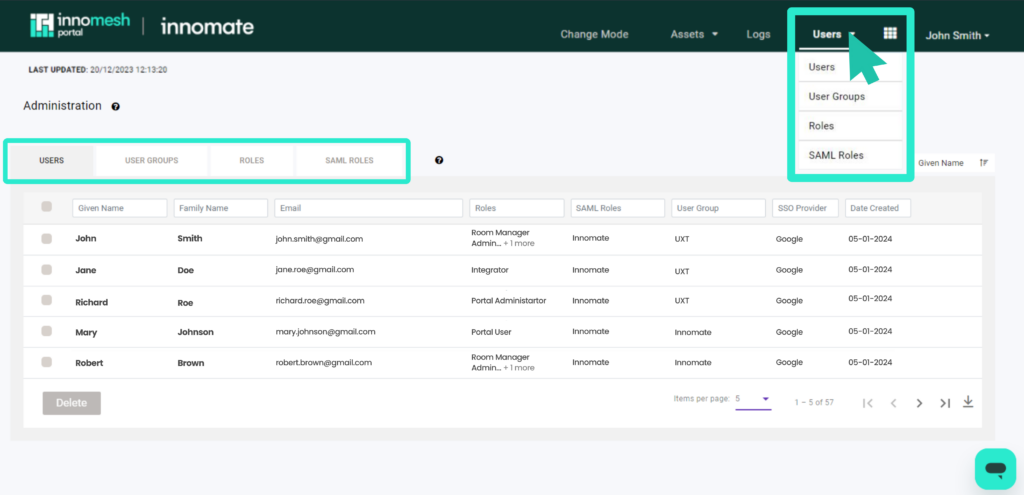
To access RBAC, navigate to the Innomesh Portal and select the “Administration” option from the dropdown menu by hovering over your name in the top right corner of the page.

Once on the Administration page, you will need to click on “Users” from the dropdown menu under “Users” to access the RBAC options, as shown below:
Users
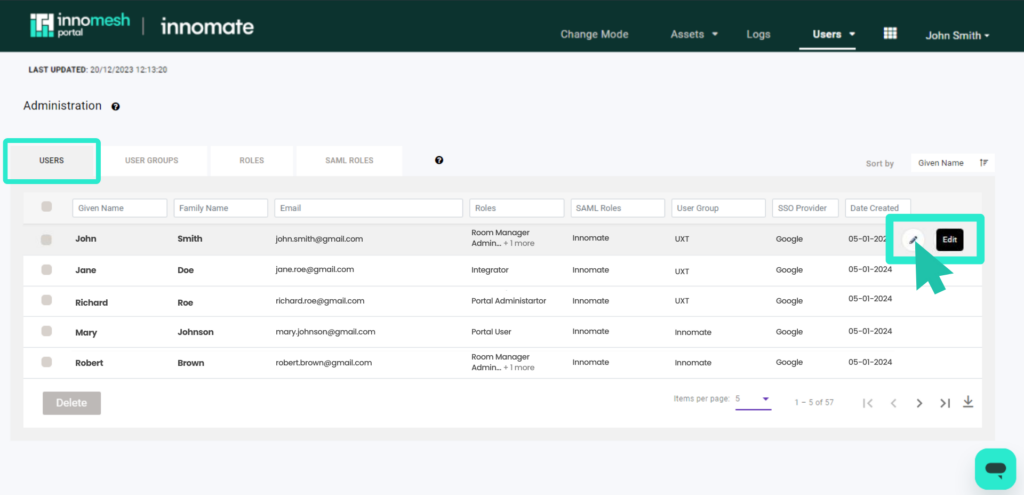
In the Users section, administrators have the ability to view and edit specific user roles or assign groups to users. This allows administrators to restrict a user’s access based on the predefined configurations of the assigned group.
When hovering over the right side of a user, the options for editing and deleting become visible.
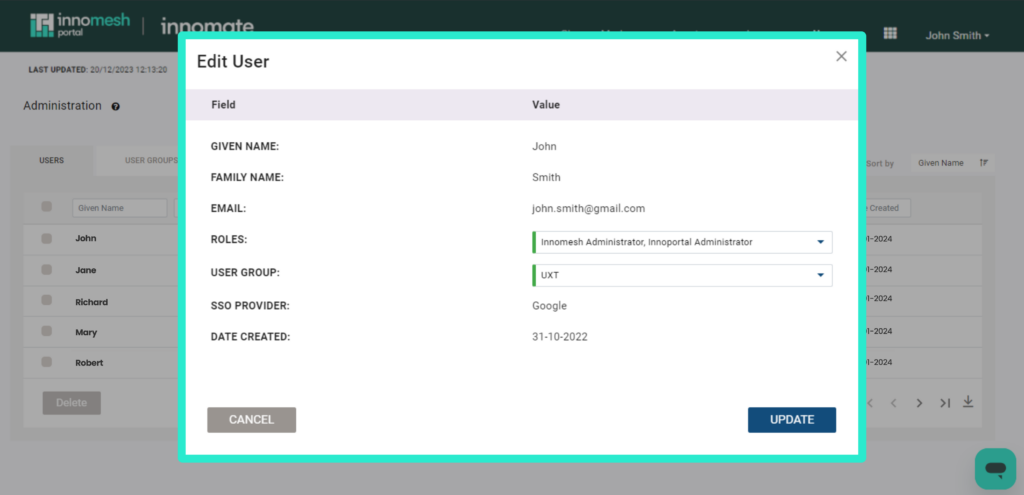
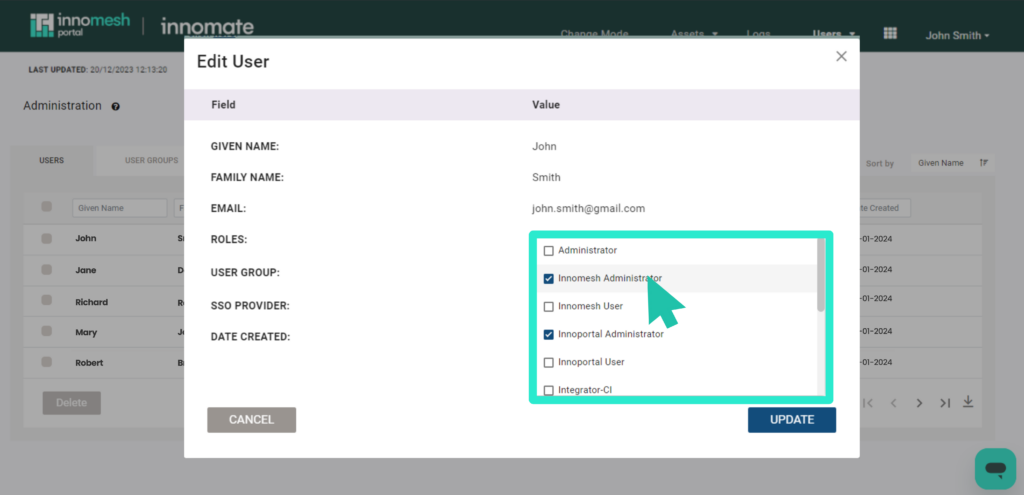
When attempting to edit a user, you can view the following information in this section: the user’s details, including their Single Sign-On (SSO) provider and the date they initially requested an account as shown below:
Roles
You can edit a user’s roles by selecting from the pre-configured roles provided by your administrator.
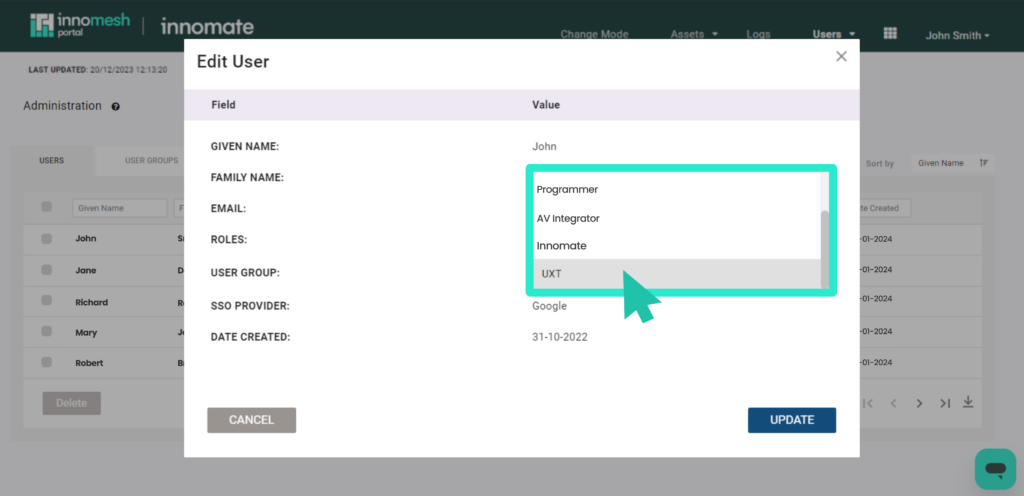
User Group
The user group dropdown option enables you to choose a specific configured group.
User Groups
User Groups are groupings by which users can be categorised. User Groups can represent organisations, departments, and specialisations. Within the user group, you have the ability to create or delete a specific group.

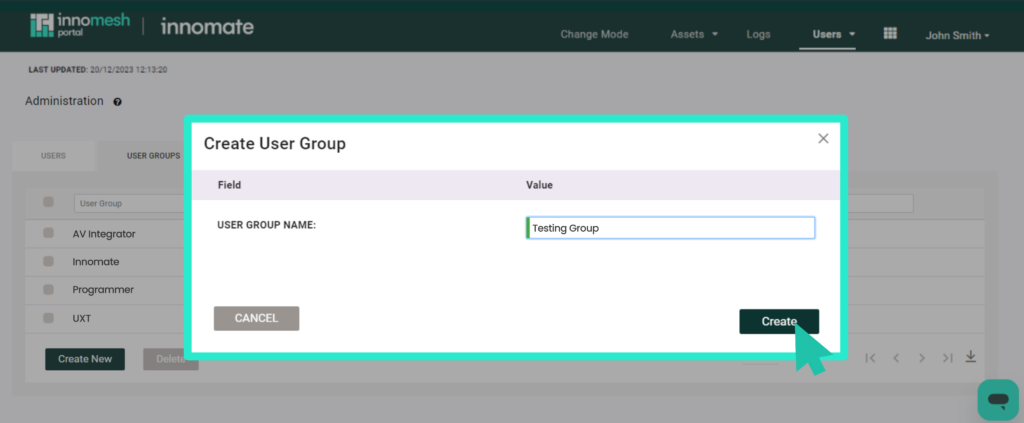
Creating a Group
You can start the group making process by clicking “Create New” as shown in previous photo which would lead you to a window as shown below:
Roles
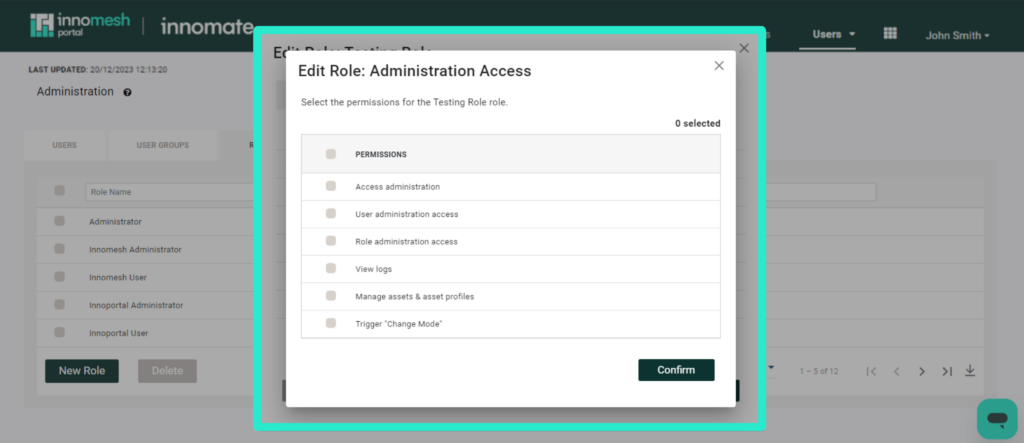
Roles define how much access a user has into the Innomesh Room Manager and Portal. Each Role defines a fine list of access permissions into various sections of Room Manager and Portal, as well as which campus and which User Groups’ rooms the user is allowed to access. Roles are enforced on the user when they next log in.
In this section, you can create, edit, and delete your desired roles. This is the core aspect of RBAC, empowering you to configure all permissions, including those associated with specific groups.
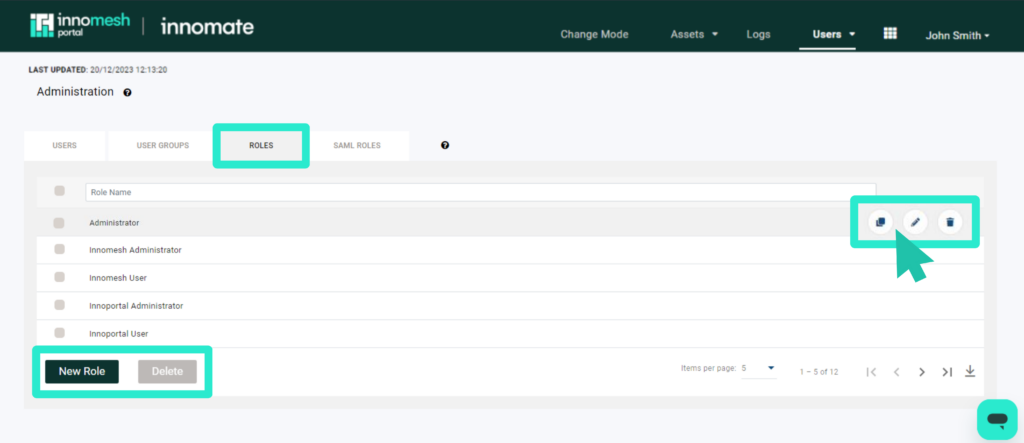
Creating a Role
To create a new role, click the “New Role” button, as shown in the previous image. This action will open a window, presenting the necessary options for configuring a role:
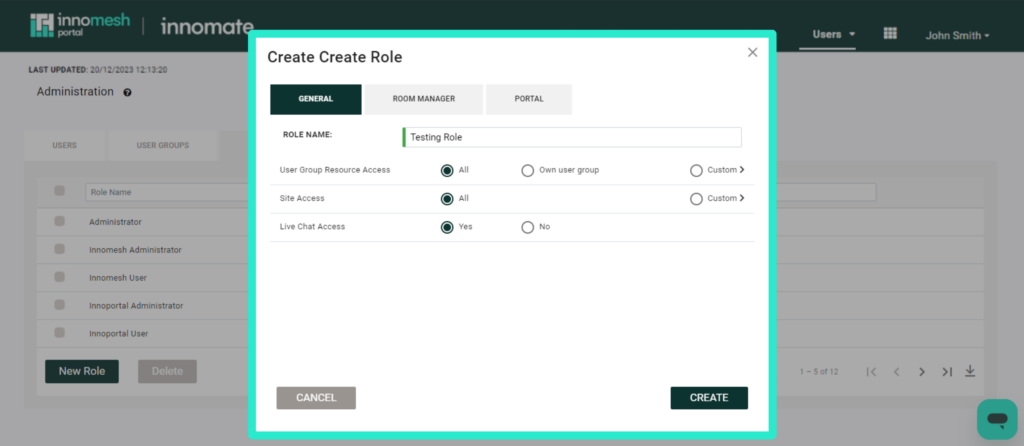
General
Within the General tab, you can manage and set up the role’s general access to the platform. Below are descriptions of each option:
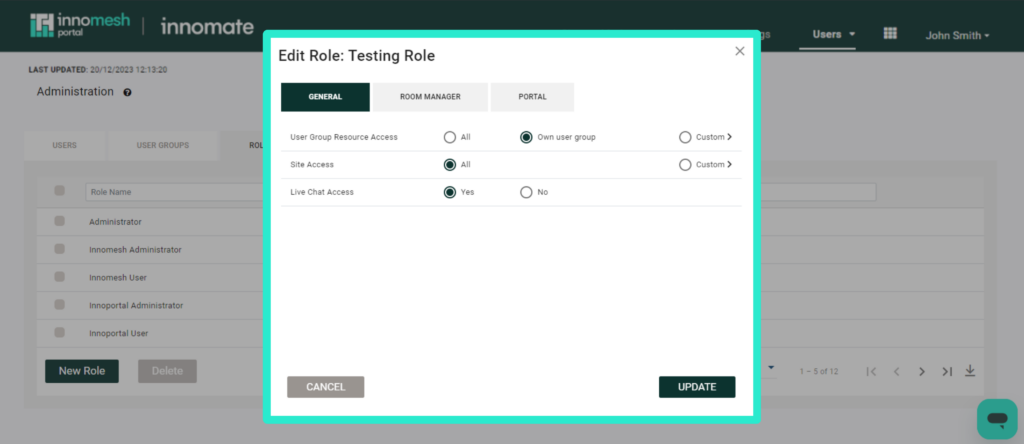
User Group Resource Access
This determines which User Group’s rooms this role can access.
- The “All” option grants users access to edit every group’s rooms.
- With the “Own User Group” option, users can only access and edit rooms within their own user group, as demonstrated below. (eg. Testing Group for user John Smith)
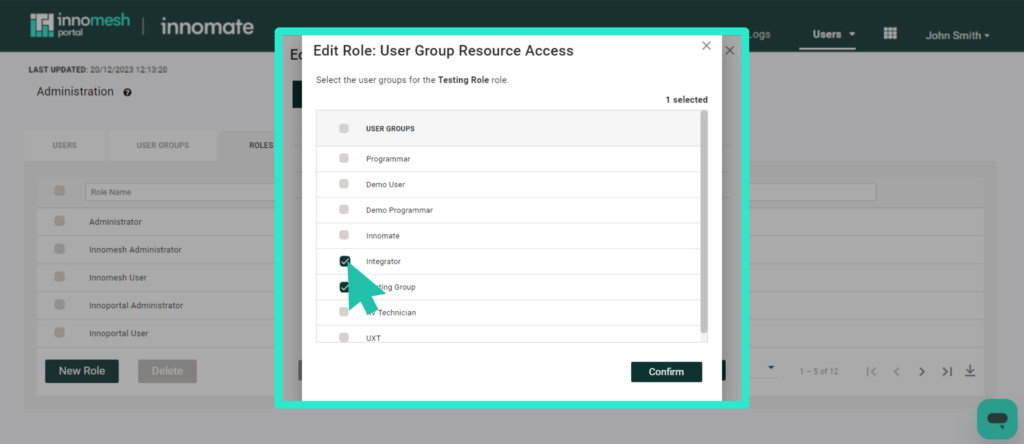
- The “Custom” option allows you to select specific user groups that you would like this role to access as shown below:
Site Access
Site Access determines which site this role can access. It can be set to “All” if the corresponding option is selected, or it can return an array of sites if “Custom” is chosen.
Live Chat Access
Choose “Yes” or “No” based on your preferences for users with this role to access via live chat.
Room Manager
This tab allows you to configure and restrict this role to determine what users can view and edit within the Innomesh Room Manager.
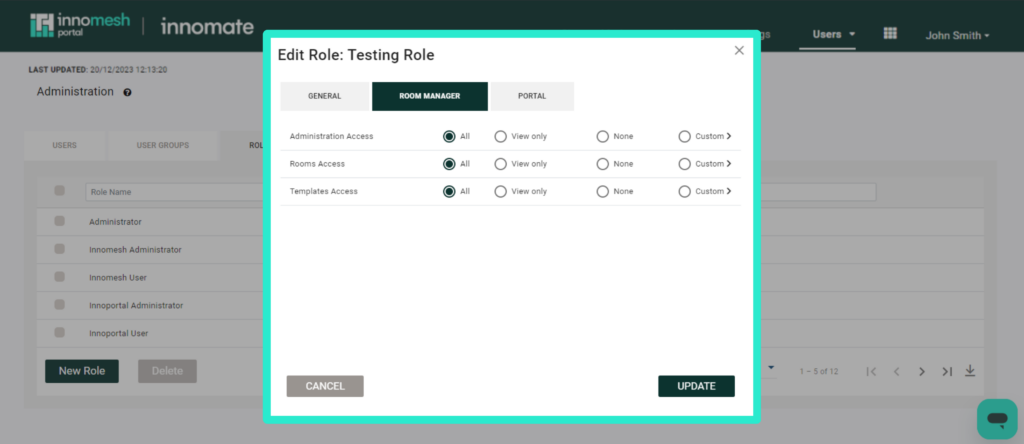
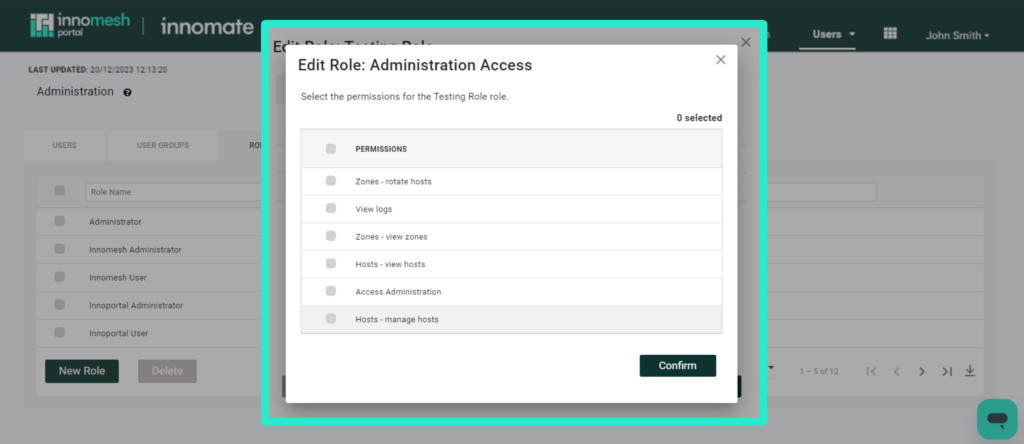
Administration Access
This field enables you to customise what this role can do within Innomesh’s administration section.
| Permission Name | Included in “View Only” | Description |
|---|---|---|
| Access Administration | ✔ | – Administration menu |
| Zones – view zones | ✔ | – View zones – Download zones CSV |
| Zones – rotate hosts | – Rotate hosts | |
| Hosts – view hosts | ✔ | – View hosts – Download hosts CSV – Launch host website |
| Hosts – manage hosts | – Enable Space VC host – Disable Space VC host – Drain Space CE host (future) | |
| View logs | ✔ | – View room manager logs only – View all logs (if ip-admin-logs also enabled) |
- The “All” option allows the user to view and access all of the functions in the table above
- The “View only” option permits users to only view the functions marked as “Included in “View Only” from the table above.
- The “None” option restricts users from accessing the rooms tab.
- The “Customise” option allows you to choose the specific fields that the user can view and access within the Rooms tab from the table above:
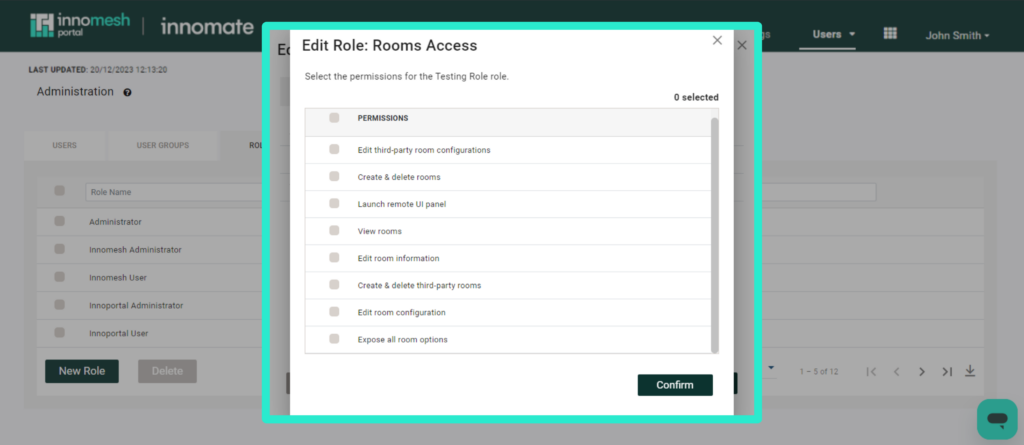
Rooms Access
This field allows you to configure the permissions for this role within the Room Manager’s “Rooms” tab.
| Permission Name | Included in “View Only” | Description |
|---|---|---|
| View rooms | ✔ | – View rooms (Main Rooms tab) – Search rooms – Download rooms as CSV – View “Rooms Deployed” against template (in Templates section, assuming user has “View templates” permission) |
| Create & delete rooms | – Create new Space, Sight, Pulse room – Delete room – Duplicate room – Mass create room – Mass delete rooms | |
| Edit room configuration | – Edit existing room – Move rooms between zones – Update room software – Upgrade Pulse to Sight – Load room from file – Update XPanel – Update VNC – Update web panel – Pull update from template – Push template update to rooms | |
| Edit room information | – Edit room information | |
| Expose all room options | – Expose all room options (for Space CE rooms) | |
| Launch remote UI panel | ✔ | – Launch XPanel, VNC, Web Panel |
| Create & delete third-party rooms | – Create third party room – Delete third party room | |
| Edit third-party room configurations | – Edit third-party room – Move third-party room between zones – Update XPanel | |
| Mass onboard UC rooms | – Mass create Sight rooms for UC management (for Microsoft Teams) |
- The “All” option allows the user to view and access all of the functions in the table above
- The “View only” option permits users to only view the functions marked as “Included in “View Only” from the table above.
- The “None” option restricts users from accessing the rooms tab.
- The “Customise” option allows you to choose the specific fields that the user can view and access within the Rooms tab from the table above:
Templates Access
This field allows you to configure the permissions for this role within the Room Manager’s “Templates” tab.
| Permission Name | Included in “View Only” | Description |
|---|---|---|
| Create & delete third-party Template | – Create third party template – Delete third party template | |
| Edit third-party template configurations | – Edit third-party template – Move third-party template between zones – Update XPanel | |
| View templates | ✔ | – View templates – Download templates as CSV – View Template via “Template Name” link (in Rooms section) |
| Create & delete templates | – Create new template – Delete template – Duplicate template – Mass delete templates | |
| Edit template configuration | – Edit existing template – Update template software – Update XPanel – Update VNC – Update web panel – Load template from file – Room state mapping (for Sight templates) | |
| Edit information template association | – Update Information Template | |
| Edit template room options | – Update Room Options |
- The “All” option allows the user to view and access all of the functions in the table above
- The “View only” option permits users to only view the functions marked as “Included in “View Only” from the table above.
- The “None” option restricts users from accessing the rooms tab.
- The “Customise” option allows you to choose the specific fields that the user can view and access within the Rooms tab from the table above:

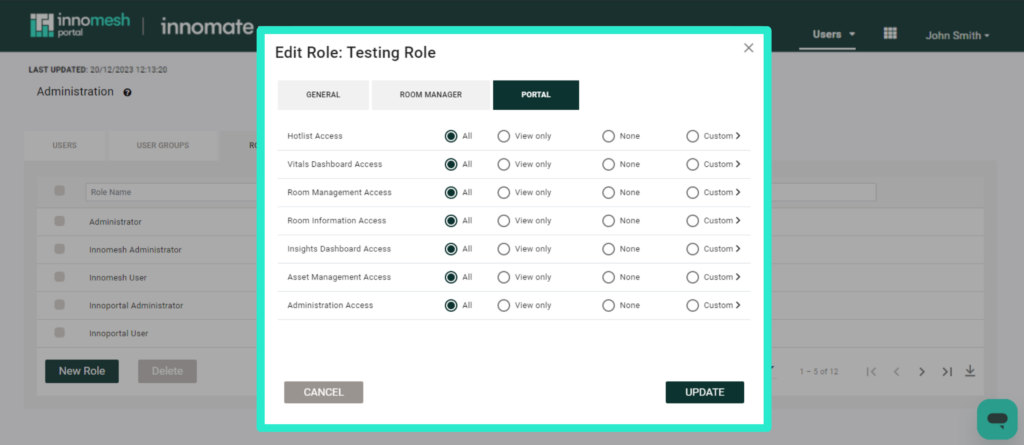
Portal
This tab enables you to define and limit the role’s scope in terms of what users can view and accomplish within the Innomesh Portal
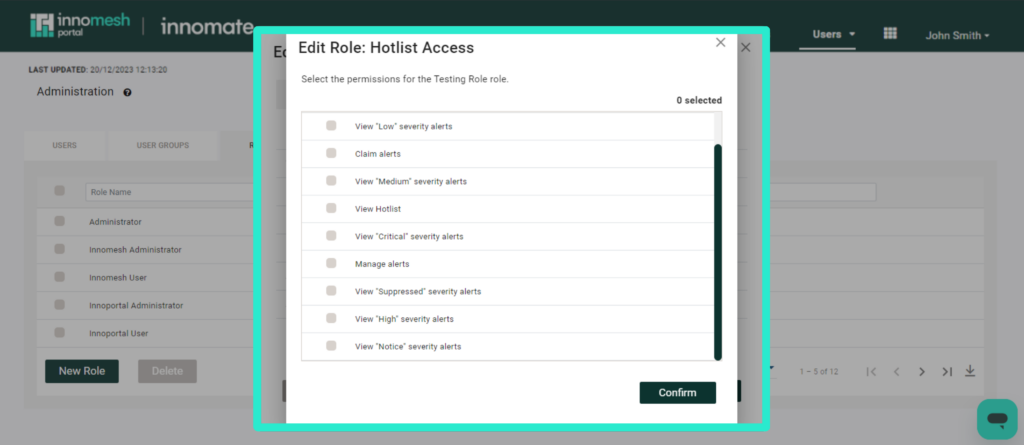
Hotlist Access
This field allows you to configure the permissions for this role within the Portal’s “Hotlist” tab.
| Permission Name | Included in “View Only” | Description |
|---|---|---|
| View Hotlist | ✔ | – View hotlist – Search hotlist – Filter hotlist – Sort hotlist – Hotlist group by room |
| View “Critical” severity alerts | ✔ | – Hotlist “critical” severity alert tab |
| View “High” severity alerts | ✔ | – Hotlist “high” severity alert tab |
| View “Medium” severity alerts | ✔ | – Hotlist “medium” severity alert tab |
| View “Low” severity alerts | ✔ | – Hotlist “low” severity alert tab |
| View “Notice” severity alerts | ✔ | – Hotlist “notice” severity alert tab |
| View “Suppressed” severity alerts | ✔ | – Hotlist “suppressed” severity alert tab |
| Claim alerts | – Claim alert – Mass claim alerts – Update alerts (add alert notes) – Mass add alert notes | |
| Manage alerts | – Assign alert – Mass assign alerts – Create ticket – Resolve alert – Mass resolve alerts (future) – Set alert as non-SLA – Suppress alert – Manage Suppressed Alert rules – View alert history |
- The “All” option allows the user to view and access all of the functions in the table above
- The “View only” option permits users to only view the functions marked as “Included in “View Only” from the table above.
- The “None” option restricts users from accessing the rooms tab.
- The “Customise” option allows you to choose the specific fields that the user can view and access within the Rooms tab from the table above:
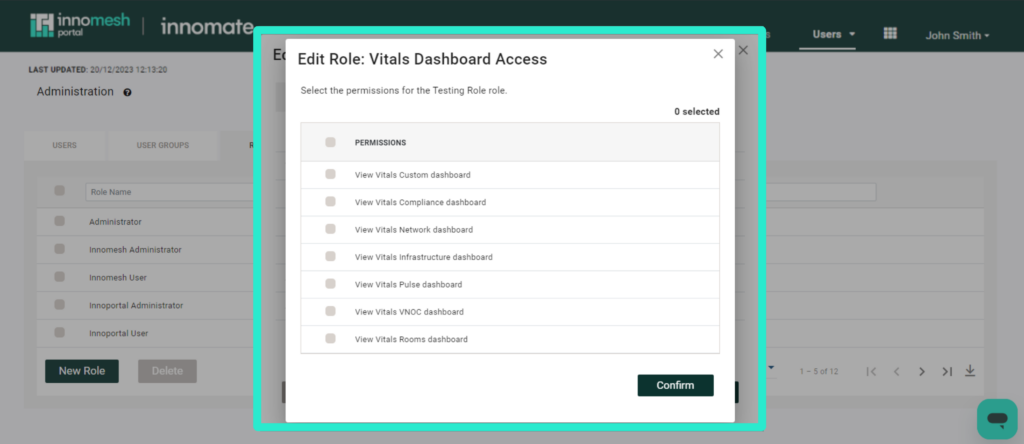
Vitals Dashboard Access
This field allows you to configure the permissions for this role within the Portal’s “Vitals Dashboard” tab.
| Permission Name | Included in “View Only” | Description |
|---|---|---|
| View Vitals Infrastructure dashboard | ✔ | – View Vitals Infrastructure dashboard |
| View Vitals Rooms dashboard | ✔ | – View Vitals Rooms dashboard |
| View Vitals Network dashboard | ✔ | – View Vitals Network dashboard |
| View Vitals Pulse dashboard | ✔ | – View Vitals Pulse dashboard |
| View Vitals Sight dashboard | ✔ | – View Vitals Sight dashboard |
| View Vitals Compliance dashboard | ✔ | – View Vitals Compliance dashboard |
| View Vitals VNOC dashboard | ✔ | – View Vitals VNOC dashboard |
| View Vitals Custom dashboard | ✔ | – View Vitals Custom dashboard |
- The “All” option allows the user to view and access all of the functions in the table above
- The “View only” option permits users to only view the functions marked as “Included in “View Only” from the table above.
- The “None” option restricts users from accessing the rooms tab.
- The “Customise” option allows you to choose the specific fields that the user can view and access within the Rooms tab from the table above:
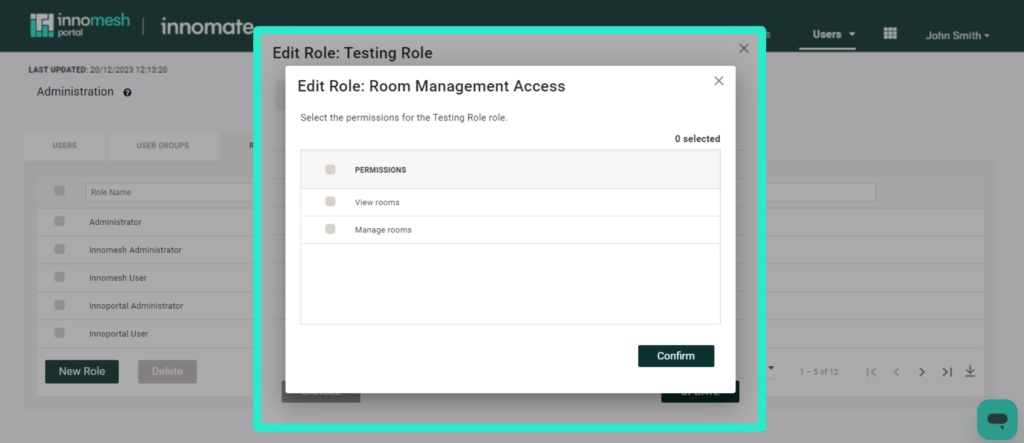
Room Management Access
This field allows you to configure the permissions for this role within the Portal’s “Rooms” tab.
| Permission Name | Included in “View Only” | Description |
|---|---|---|
| View rooms | ✔ | – View Rooms page – View Rooms Live Info – View Rooms Insights – Sort Rooms – Filter Rooms – “Show Room” link (from Assets page) |
| Manage rooms | – Set Maintenance – Trigger Room Operations | |
| Launch remote UI panel | – Launch XPanel – Launch VNC – Launch Web Panel |
- The “All” option allows the user to view and access all of the functions in the table above
- The “View only” option permits users to only view the functions marked as “Included in “View Only” from the table above.
- The “None” option restricts users from accessing the rooms tab.
- The “Customise” option allows you to choose the specific fields that the user can view and access within the Rooms tab from the table above:
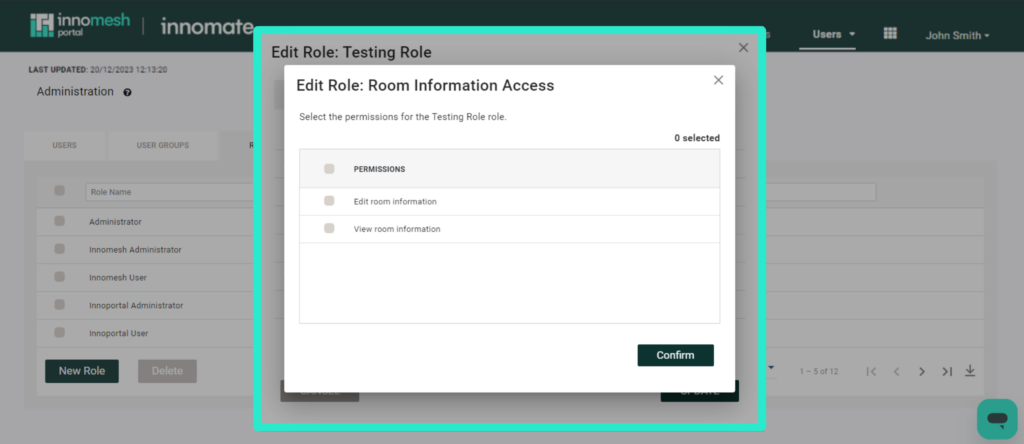
Room Information Access
This field allows you to configure the permissions for this role within the Portal’s “Information” tab.
| Permission Name | Included in “View Only” | Description |
|---|---|---|
| View room information | ✔ | – View Room Information page – Search Room Information – Sort Room Information – Download Room Information CSV |
| Edit room information | – Toggle Edit Mode – Toggle Mass Edit Mode – Save Edits – Discard Edits |
- The “All” option allows the user to view and access all of the functions in the table above
- The “View only” option permits users to only view the functions marked as “Included in “View Only” from the table above.
- The “None” option restricts users from accessing the rooms tab.
- The “Customise” option allows you to choose the specific fields that the user can view and access within the Rooms tab from the table above:
Insights Dashboard Access
This field allows you to configure the permissions for this role within the Portal’s “Insights Dashboard” tab.
| Permission Name | Included in “View Only” | Description |
|---|---|---|
| View “Rooms” dashboard | ✔ | – View Insights Rooms dashboard |
| View “Usage” dashboard | ✔ | – View Insights Usage dashboard |
| View “Alerts” dashboard | ✔ | – View Insights Alerts dashboard |
| View “Proactive Support” dashboard | ✔ | – View Insights Proactive Support dashboard |
| View “Consumption” dashboard | ✔ | – View Insights Consumption dashboard |
| View “Sight” dashboard | ✔ | – View Insights Sight dashboard |
| View “Ops” dashboard | ✔ | – View Insights Ops dashboard |
| View “Custom” dashboard | ✔ | – View Insights Custom dashboard |
- The “All” option allows the user to view and access all of the functions in the table above
- The “View only” option permits users to only view the functions marked as “Included in “View Only” from the table above.
- The “None” option restricts users from accessing the rooms tab.
- The “Customise” option allows you to choose the specific fields that the user can view and access within the Rooms tab from the table above:

Asset Management Access
This field allows you to configure the permissions for this role within the Portal’s “Assets” tab.
| Permission Name | Included in “View Only” | Description |
|---|---|---|
| View assets | ✔ | – View Assets page – View Asset details – View Asset live info – Sort Assets – Filter Assets – Customise Asset view – Download Assets CSV – View room assets (from Rooms page) – View hotlist alert asset (link from hotlist alert details view) |
| Manage assets | – Edit Asset Details | |
| Perform asset operations | – Trigger Asset Operations – Mass Trigger Asset Operations – Filter by Operations |
- The “All” option allows the user to view and access all of the functions in the table above
- The “View only” option permits users to only view the functions marked as “Included in “View Only” from the table above.
- The “None” option restricts users from accessing the rooms tab.
- The “Customise” option allows you to choose the specific fields that the user can view and access within the Rooms tab from the table above:

Administration Access
This field allows you to configure the permissions for this role within the Portal’s “Administration” section.
| Permission Name | Included in “View Only” | Description |
|---|---|---|
| Access administration | ✔ | – Administration menu |
| Trigger “Change Mode” | – Change Mode page access – Change Mode trigger | |
| Manage assets & asset profiles | – Asset profiles – Asset driver management – Asset compliance management – Custom asset fields – Asset operations update and file management – Asset operations schedule (future) – Asset campaigns (future) | |
| View logs | ✔ | – View room manager logs only – View all logs (if ip-admin-logs also enabled) |
| Manage Users | – Update User – Delete User | |
| Manage Roles | – Create Role – Update Role – Delete Role – Create User Group – Update User Group – Delete User Group – Update SAML Roles – Delete SAML Roles | |
| Manage Smart Room Attributes | – Manage Smart Room Attributes | |
| View data import / export configurations | ✔ | – View data import configurations – View data export configurations |
| Edit data import / export configurations | – Create data import configurations – Create data export configurations – Edit data import configurations – Edit data export configurations – Duplicate data import configurations – Duplicate data export configurations – Delete data import configurations – Delete data export configurations | |
| Manage Summary Views | – Create Summary View – Edit Summary View – Duplicate Summary View – Delete Summary View |
- The “All” option allows the user to view and access all of the functions in the table above
- The “View only” option permits users to only view the functions marked as “Included in “View Only” from the table above.
- The “None” option restricts users from accessing the rooms tab.
- The “Customise” option allows you to choose the specific fields that the user can view and access within the Rooms tab from the table above: