Overview
The Microsoft Teams Rooms (MTR) intergration enables users to connect MTR devices to the platform, allowing for real-time monitoring through logs and detailed device information. It also collects data from Microsoft Teams devices to provide insights, all presented in a clear and organized format.
Device List
Viewing devices in MTR is a key feature that allows users to access data from devices in Microsoft Teams Rooms, presenting statistics such as device information, activity, and health status.

Available in this view is a list of all MTRs that are associated in Innomesh in a searchable table. Also available is an Insights dashboard with a selection of useful visualisations relating to the properties of your MTR fleet, such as their health status and their activity status.
Clicking on a Microsoft Teams Room in the devices list will bring you to that device’s Asset Page. More details about this page can be found HERE.
Additionally, the deployment process for Microsoft Teams Rooms has been uplifted in Room Manager. Please see HERE for details
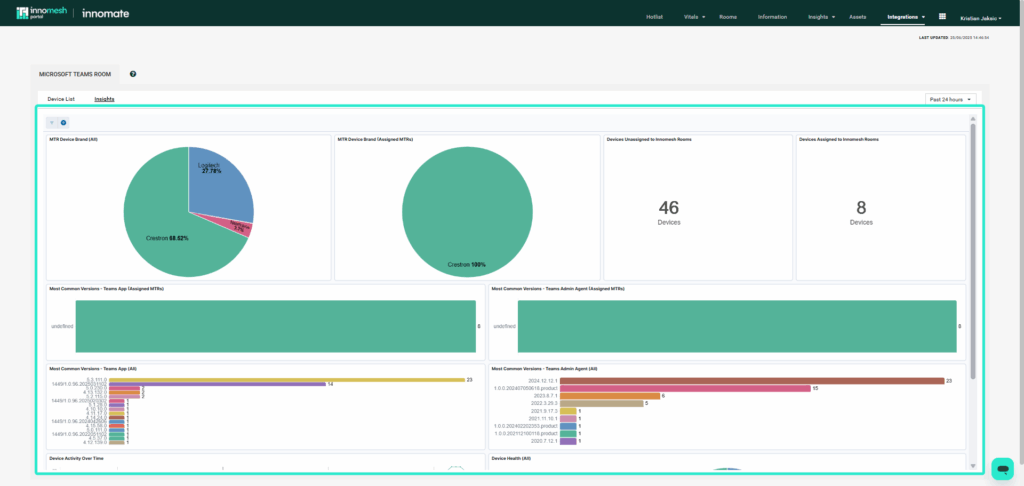
Insights
Insights presents visualized data in graph format, offering an overview of MTR device performance and usage trends.
Microsoft Teams Rooms Configuration
The Microsoft Teams Rooms management UI can now be accessed from a button on the Rooms Page of Room Manager. The new UI adds more searchable columns to the list of discovered MTRs, making it much easier to find and filter the Microsoft Teams Rooms discovered by Innomesh.
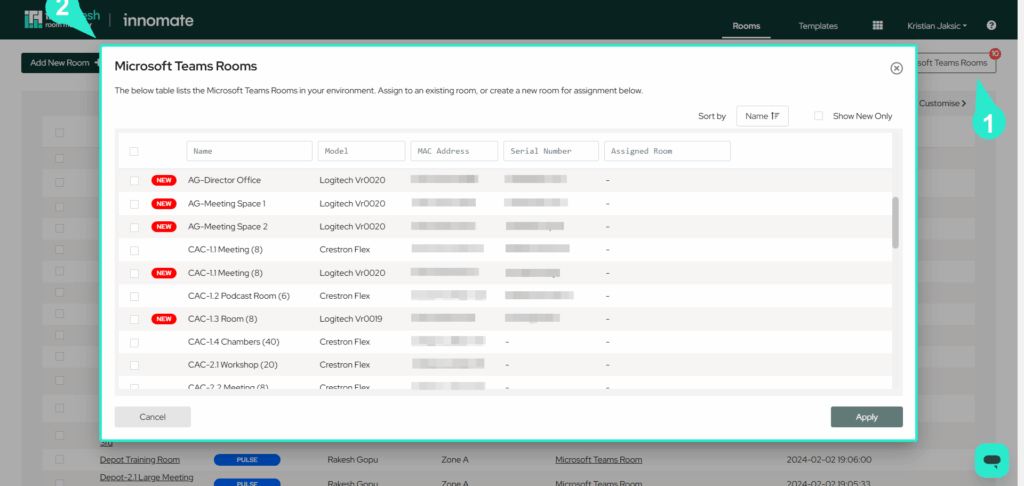
From here users can associate an MTR with either an existing room or create a new room from within this page for the MTR. There is also the option to only show new MTR’s in this list to ensure that users only see the devices that have not yet been associated.
When creating a new room, if the room is detected to contain at least one Microsoft Teams Room device, a prompt will show straight after selecting the zone to place the room in to associate the MTR to the room.
Creating Microsoft Teams Room
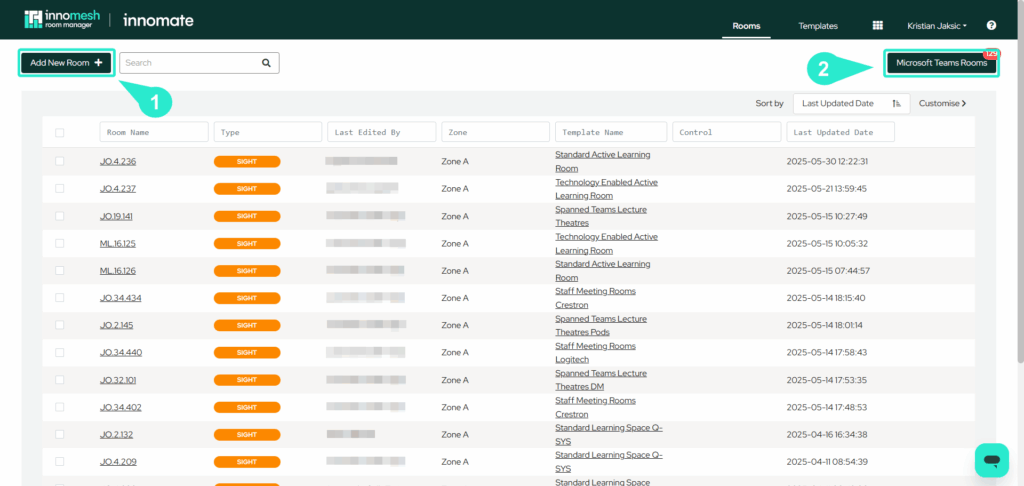
Microsoft Teams Rooms (MTR) can be deployed and managed directly through the Innomate Room Manager. On the “Rooms” page, you’ll find two available methods to implement MTR functionality, depending on whether you’re creating a new room or configuring an existing one.
Option 1
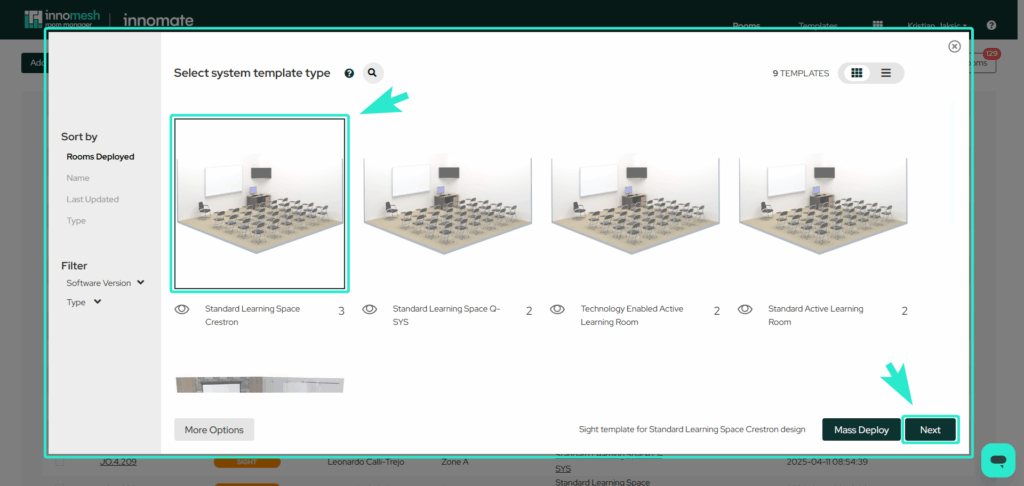
After selecting the “Add New Room” option, you’ll be prompted to choose a System Template Type from a predefined table. This selection determines how the room will be deployed and configured.
The system template defines key attributes such as the room type, Pulse/Sight/Space CE tier, number of displays, and the room layout. Choosing the appropriate template ensures your room is correctly aligned with the intended functionality and environment.
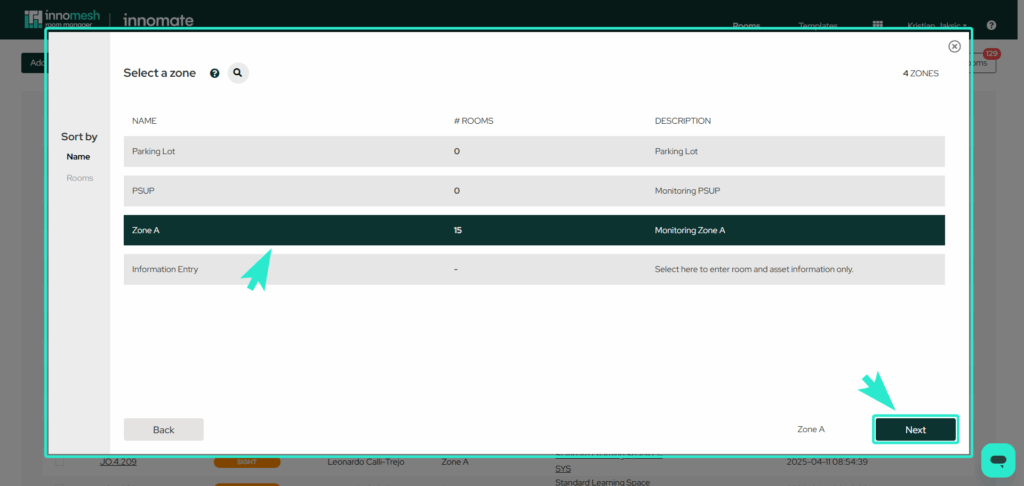
After selecting your system template, click “Next” to access the Select Zone tab. This page lets you choose which environment zone the room will belong to. Zones group rooms that share the same infrastructure and can represent a building, campus, city, country, or an abstract structure based on your organization’s setup.
Use the table to select a zone and click “Next” to proceed. You can also filter zones by name, number of hosts, or number of rooms to quickly find the right one.
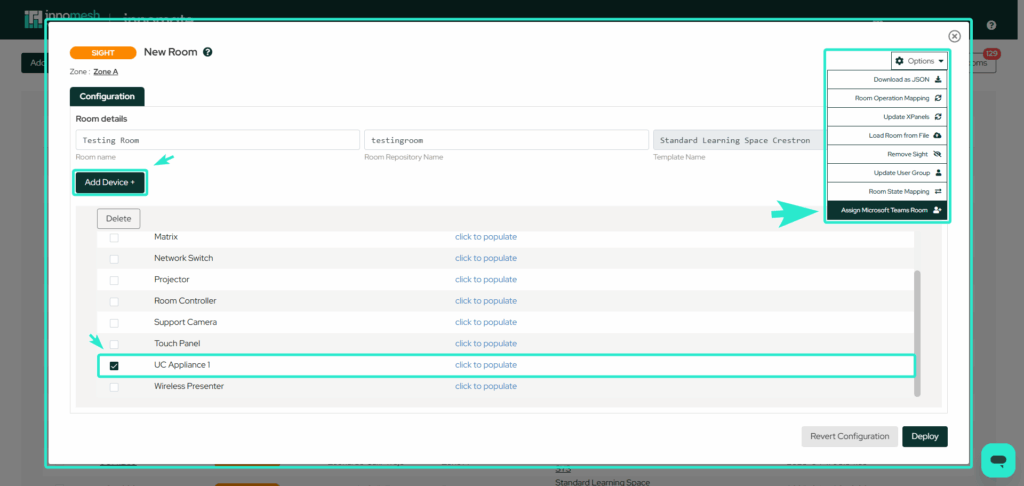
Once you’re in the room setup tab, your new room is created and ready to be configured. You’ll be prompted to enter key room details, including the room name and other information.
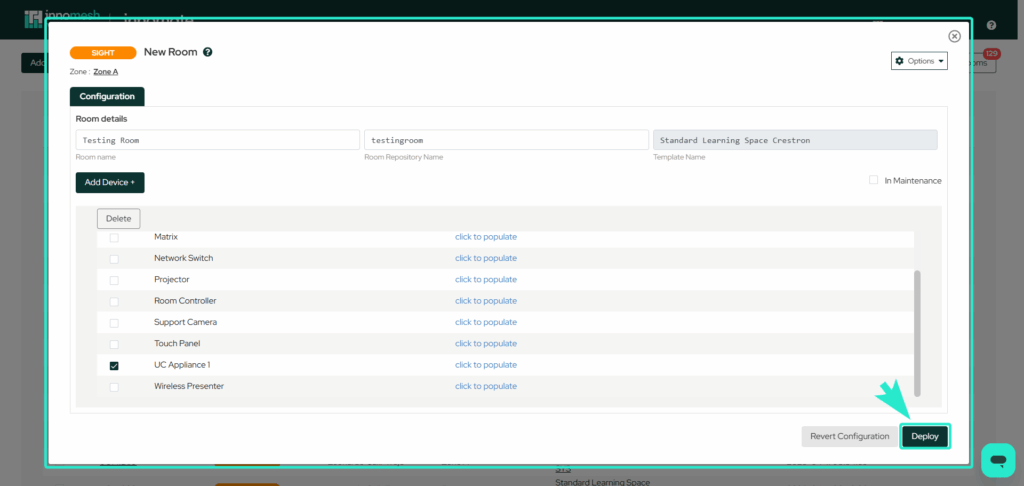
To assign a Microsoft Teams Room (MTR), you must first add an appliance device to the room. After adding the device, an “Assign Microsoft Teams Rooms” option will appear in the Options menu as a dropdown. Selecting this will link the MTR configuration to your room.
Clicking “Assign Microsoft Teams Rooms” opens a table displaying all detected MTR devices within your environment. From here, you can select the appropriate MTR device to assign to your room. Once selected, click “Assign” to confirm and complete the device assignment.
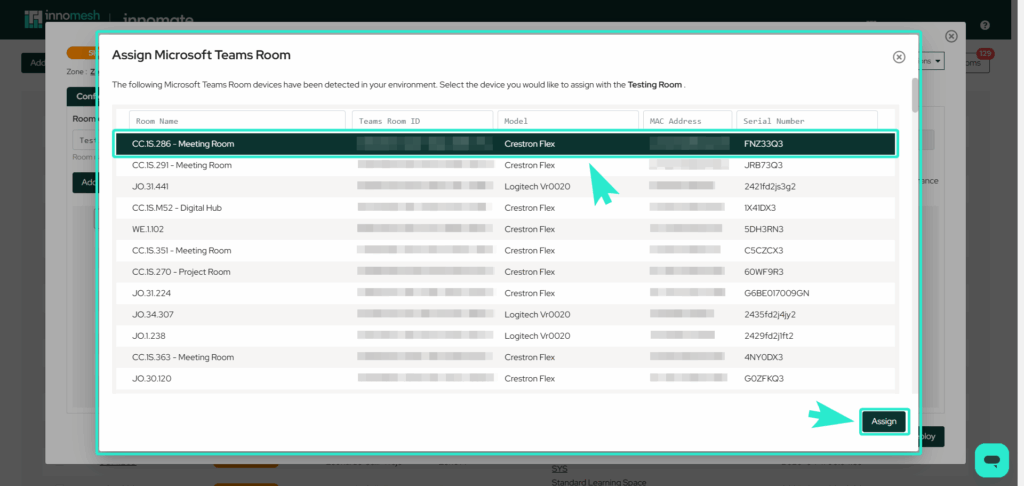
Clicking “Deploy” finalizes the setup, confirming your configuration and officially adding the new room to the Room Manager. Your room is now defined and ready for use within the environment.
Option 2
Clicking “Microsoft Teams Rooms” opens a table of MTR devices and rooms, allowing you to assign devices, select rooms, or add a device to a new room for easy MTR management.
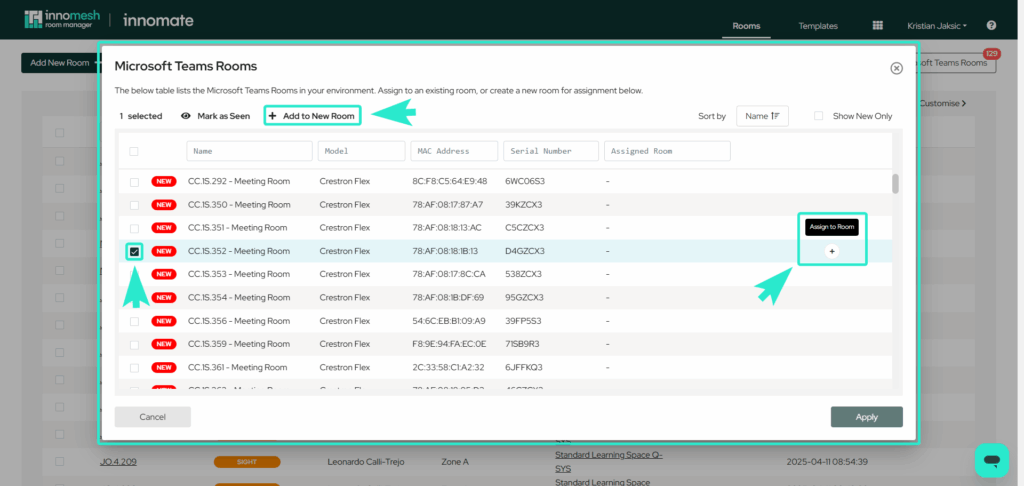
Clicking “Assign Room” opens two fields: “Assigned Room” to select the target room, and “Click to Populate” to enter the device’s IP address. The “Add to New Room” option lets you choose a room and device to create and assign it in a new room.
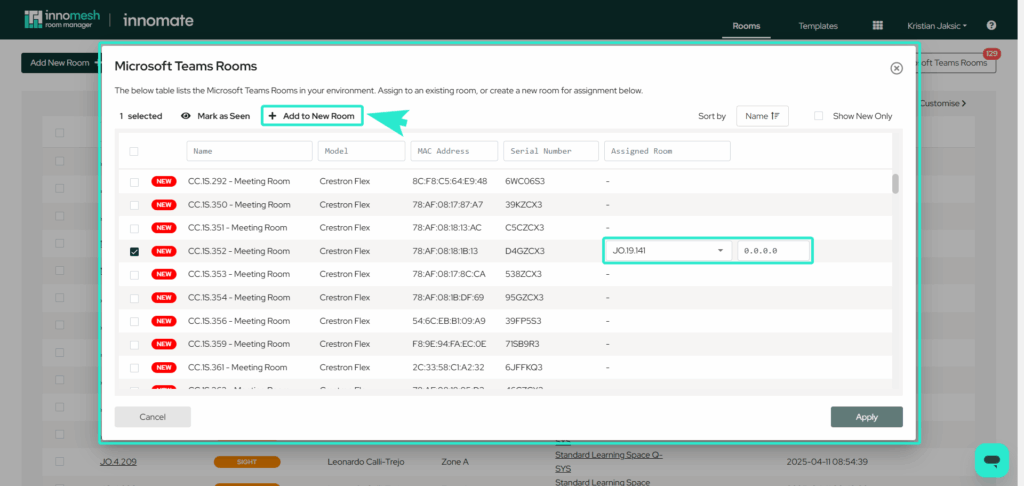
In the “Add to New Room” flow, the “Zone Name” and “Pulse/Sight Template” fields appear in the room setup bar. These prompts allow you to specify the room’s zone and assign the appropriate template. Clicking “Next” will proceed to the next step of the setup process.
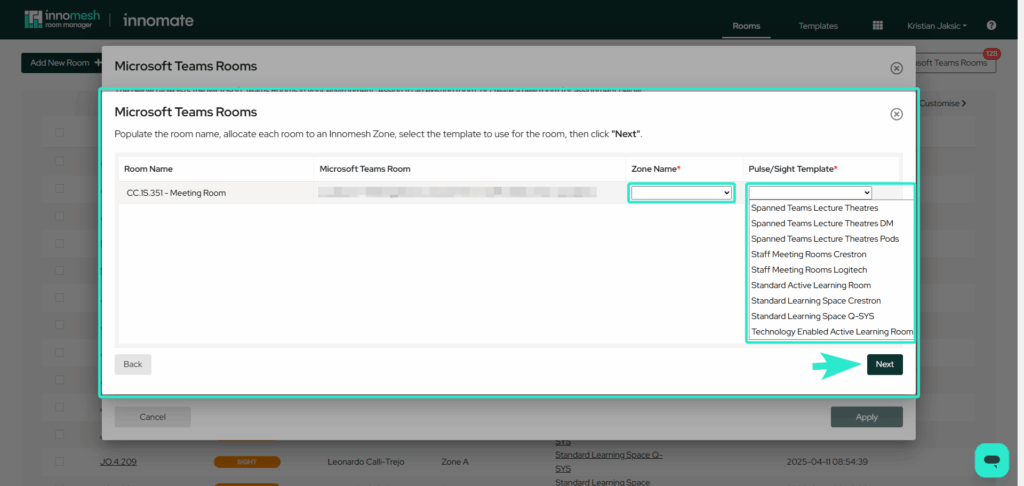
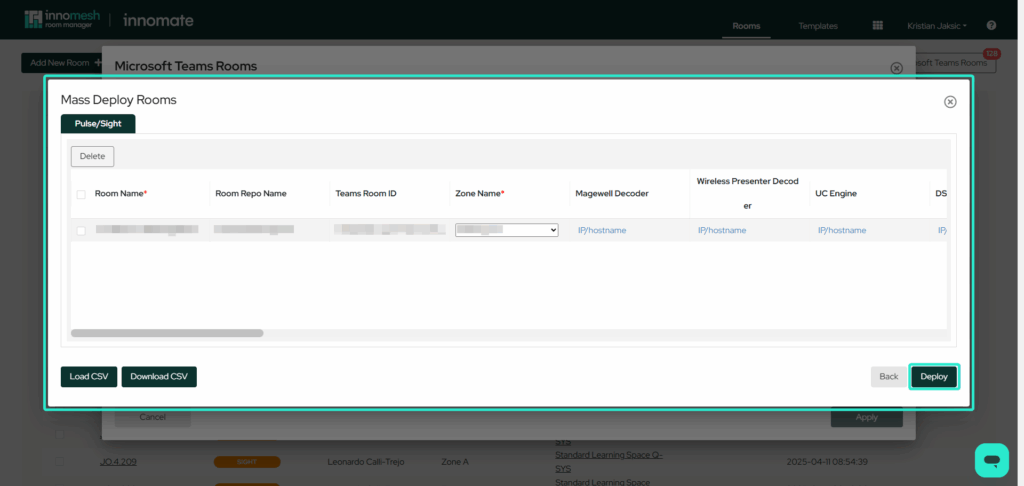
“Mass Deploy Rooms” displays a list of selected MTR rooms along with their details, and provides fields to input additional configuration information. The “Load CSV” and “Download CSV” options let you bulk manage MTR setups. Clicking “Deploy” finalizes and confirms your selected configurations.