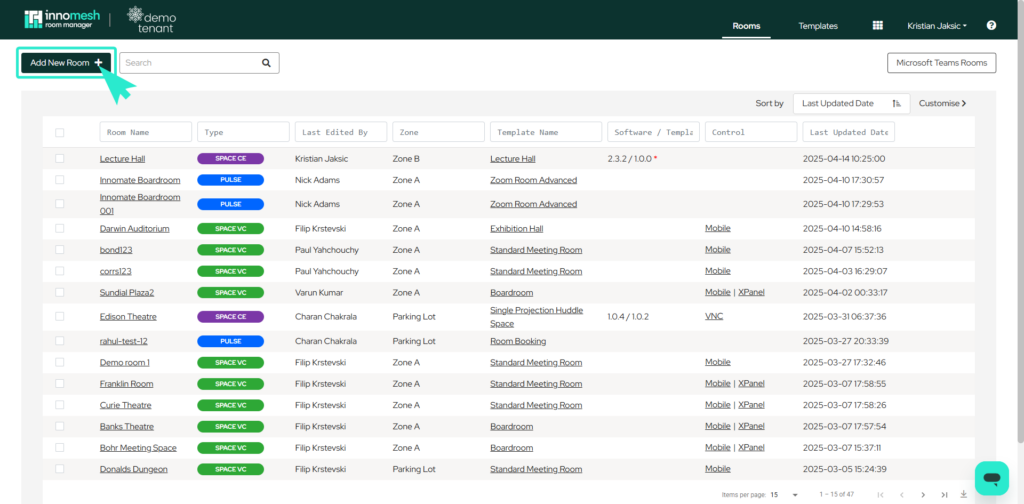
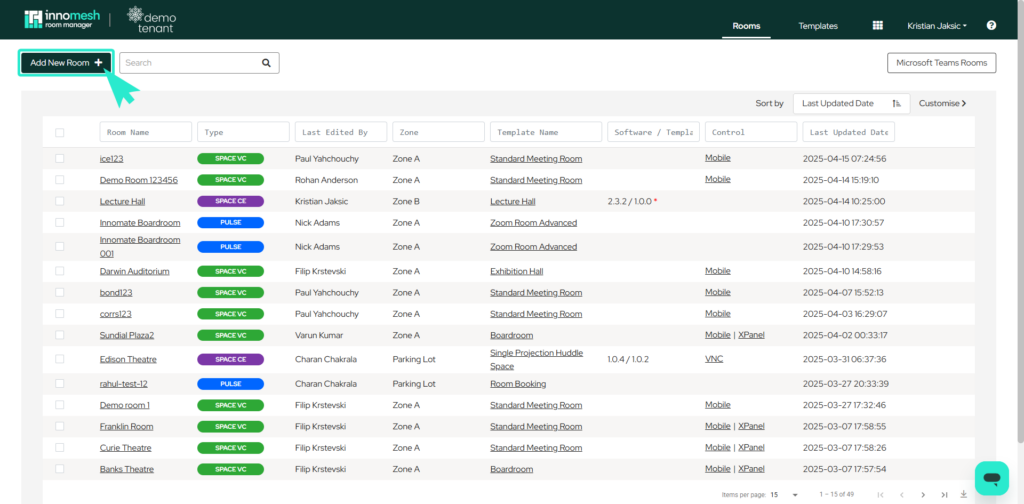
To create a new Pulse or Sight room, navigate to the Room Manager Rooms page and click on the “Add New Room” button on the top left of the page.
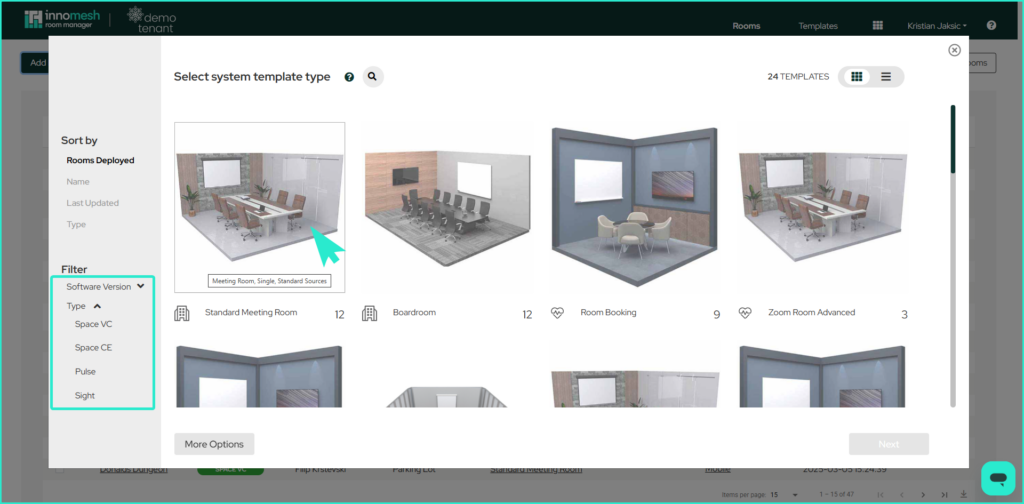
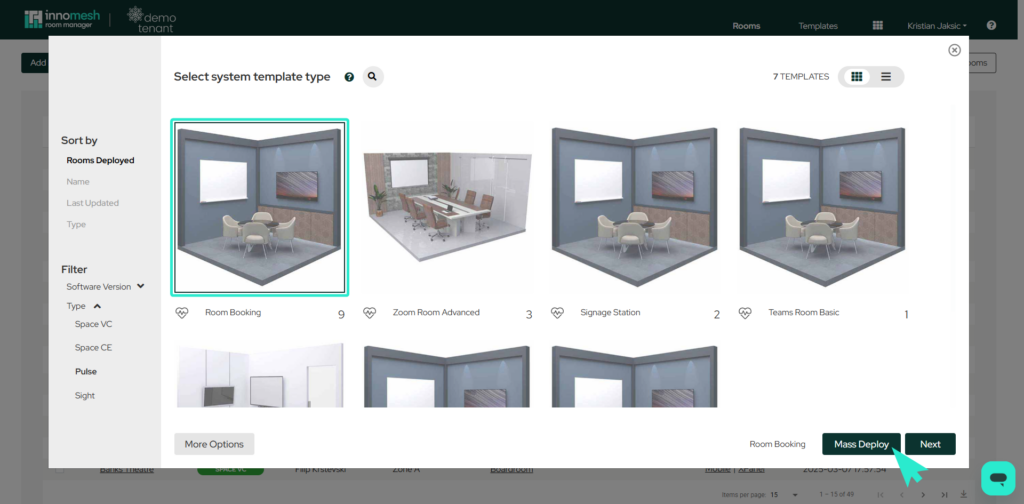
This will bring up a pop-up window showing available templates in which a room can be deployed under. Once the desired template has been selected, click on the “Next” button at the bottom right of the window.
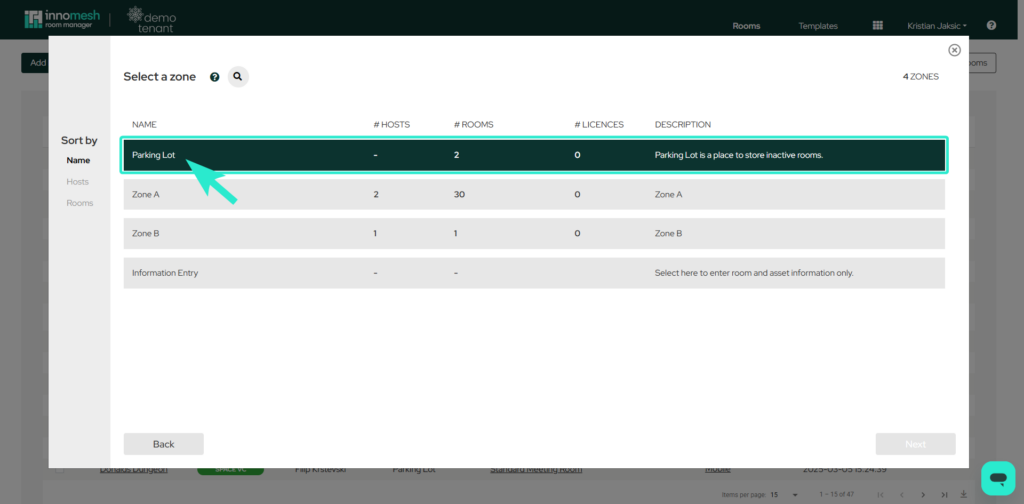
Zone
The Zone under which you will deploy this system must now be selected. Once a zone is selected, then click “Next” in the bottom right corner.
Main configuration view
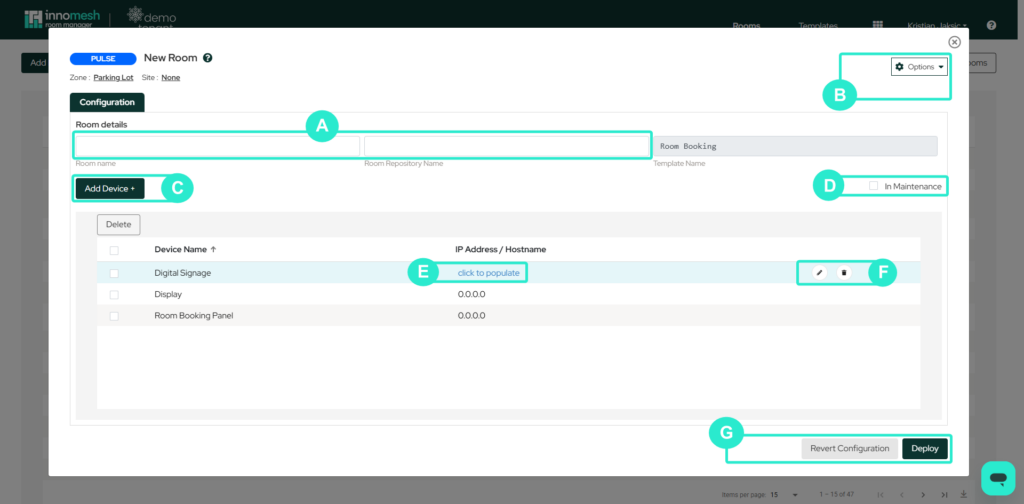
Once the zone has been selected, the configuration window will be presented. The elements in the configuration page are as follows.
A. Room Name & Room Repository Name
The ‘Friendly’ name for the room, and the name of the repository where the configuration files will be stored. The repository name will be automatically generated from the friendly name however it can be changed during room creation
B. Options (Dropdown)
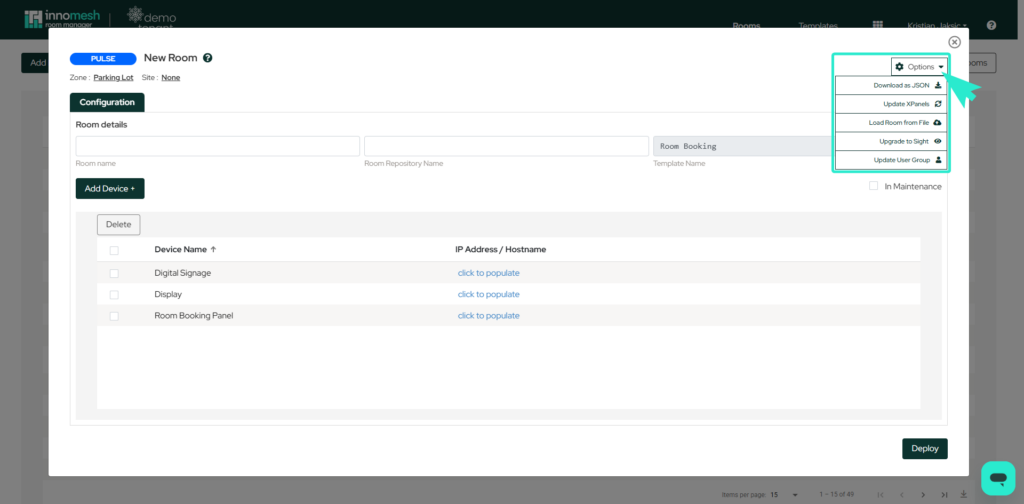
This will give you the following options: “Download as JSON”, “Update XPanels”, “Load Room from File”, “Upgrade To Sight”, “Update User Group.”
C. Add Device
Add new device button. Clicking this will begin the process of adding a new device, which will be discussed in greater detail below.
D. In Maintenance
If checked, alerts from this room will be diverted to the “Suppressed” alerts list on the Portal Hotlist. This feature can be used when the room is not functional, for example, when the room does not have power or network access.
E. IP Address/Hostname
The IP address or hostname of the device.
F. Edit and Delete
These allow a device to be duplicated, edited and deleted. The Edit button in particular will take users to a detailed view of the device, allowing for further customisation if required.
G. Deploy and Revert Configurations
1. Once Room name, Room repository name and device details have been populated, the room can be created by clicking this button.
2. To the left of ‘Deploy’ is the ‘Revert Configurations’ button, which allows you to undo all recent changes.
Add/Edit Device View
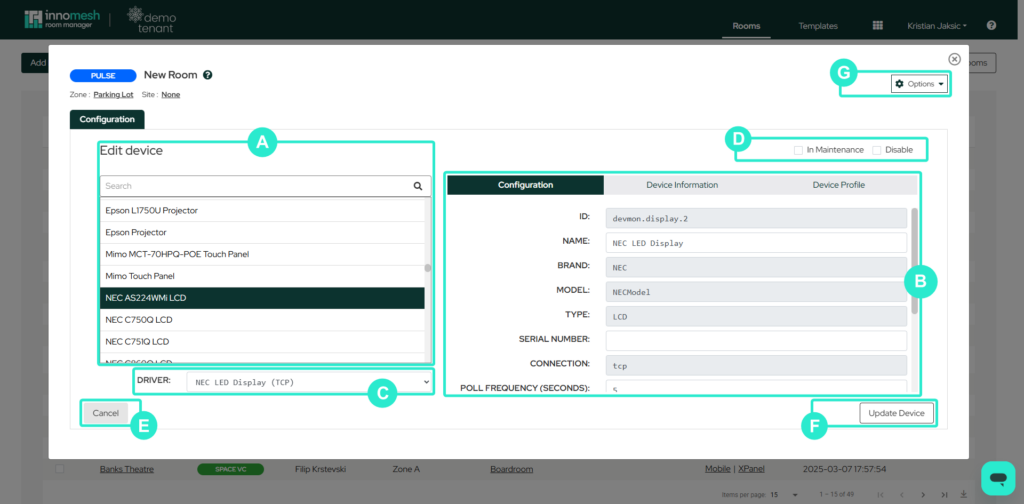
The following elements or available when creating a device, or clicking the edit button next to a device.
A. Search Bar Tab
Use the search bar to find the device you want to add or edit on this configuration page.
B. Configuration, Device Information and Device Profile
The Configurations menu allows you to input and modify details about the intended device being added. You can change fields such as ID, Name, Brand, and Model; however, some options may be unavailable if they have predefined values.

The Device Information section displays device details and provides fields to input information such as IP address, hostname, firmware version, MAC address, and more.
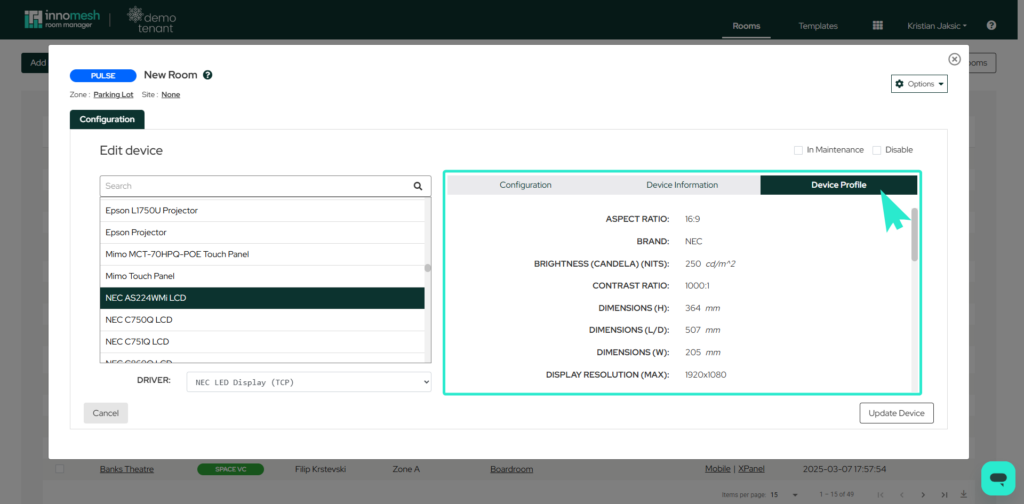
The Device Profile displays detailed information about the device’s specifications and settings.
C. Driver
The Driver section displays the selected device and its connection type.
D. In Maintenance and Disable
1. If checked, alerts from this device will be diverted to the “Suppressed” alerts list on the Portal Hotlist. This feature can be used when a faulty device needs to physically disconnected for maintenance purposes.
2. You can disable Pulse / Sight devices.
E. Cancel
Clicking ‘Cancel’ will discard all changes made on the current configuration page and return you to the configuration table in ‘New Room’.
F. Update Device
By clicking ‘Update Device,’ you confirm and apply the configurations and information entered for the configured device.
G. Options (Dropdown)
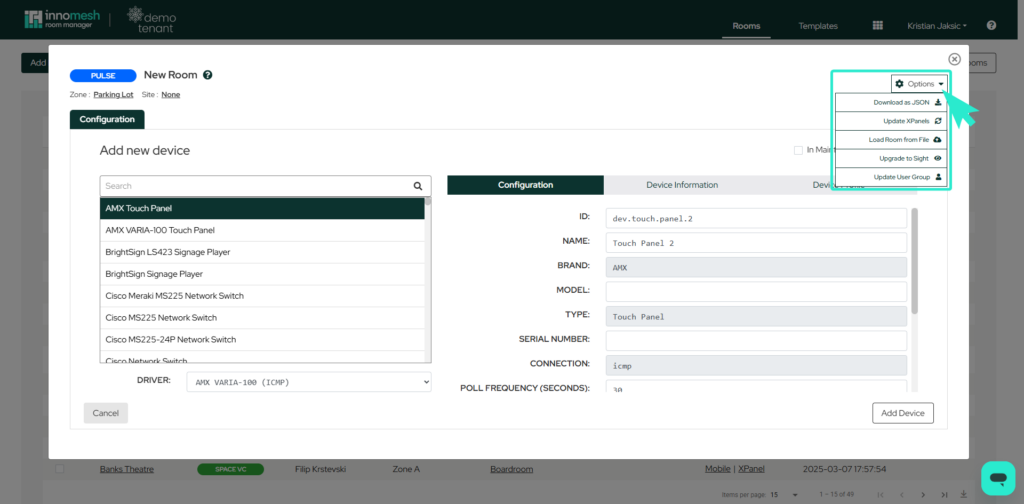
This will give you the following options: “Download as JSON”, “Update XPanels”, “Load Room from File.”, “Upgrade to Sight”, “Update User Group.”
Mass Deployment
To mass deploy Pulse rooms, navigate to the Rooms tab in the Room Manager webpage and click on the “Add New Room” button on the top left of the page.
Select the template under which you would like to deploy the room, and click on the Mass Deploy Button at the bottom right of the webpage.
In this view, new rooms can be added at the top right of the window, rooms can be loaded from a .csv file, download to a .csv file and finally deployed at the bottom right of the window.

Download rooms to CSV
To download the current configuration to file, simply click on the “Download CSV” file button in the bottom left corner of the window.
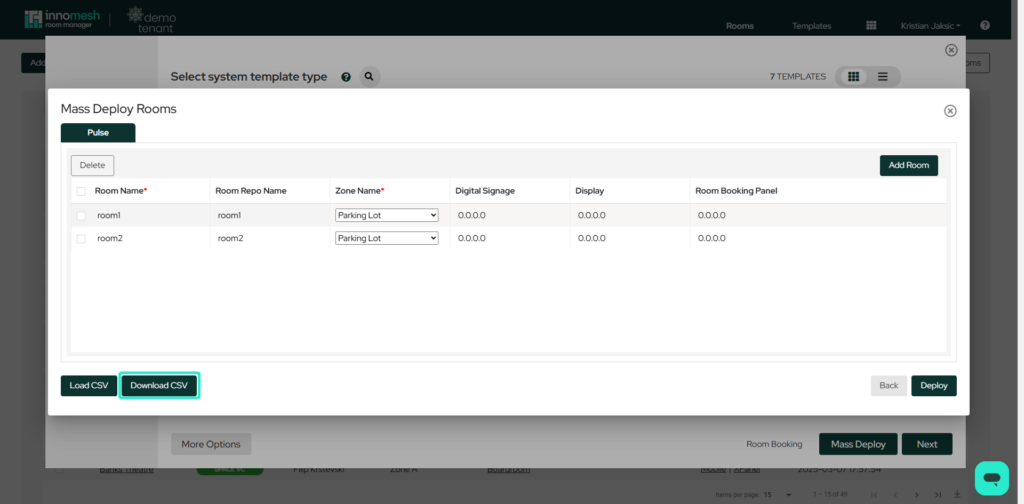
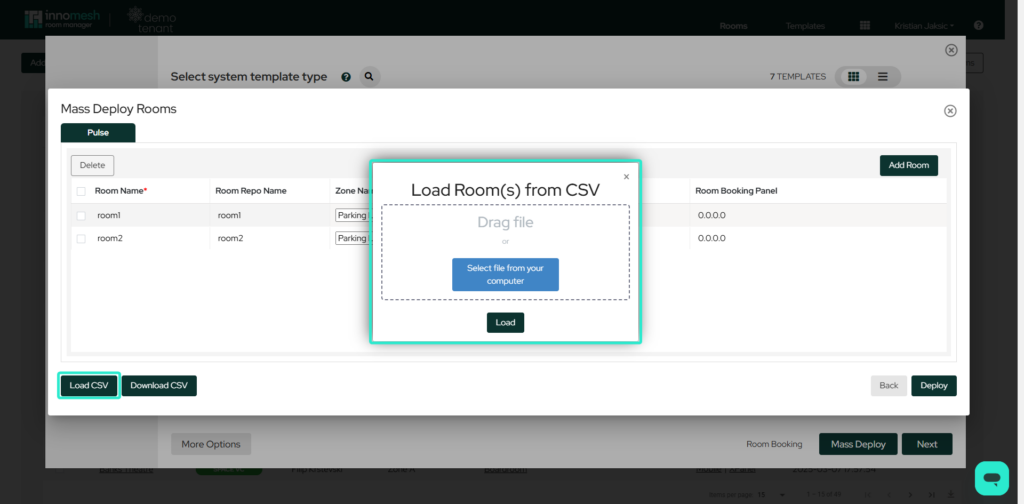
Load rooms from CSV
Room and device information can be loaded from a CSV file, simply by uploading the file into the portal.
Select “Load CSV” in the bottom left corner of the window then drag or navigate to the file on your local device. Click “Load” to load the chosen CSV file.