Creating a Room with SpaceVC
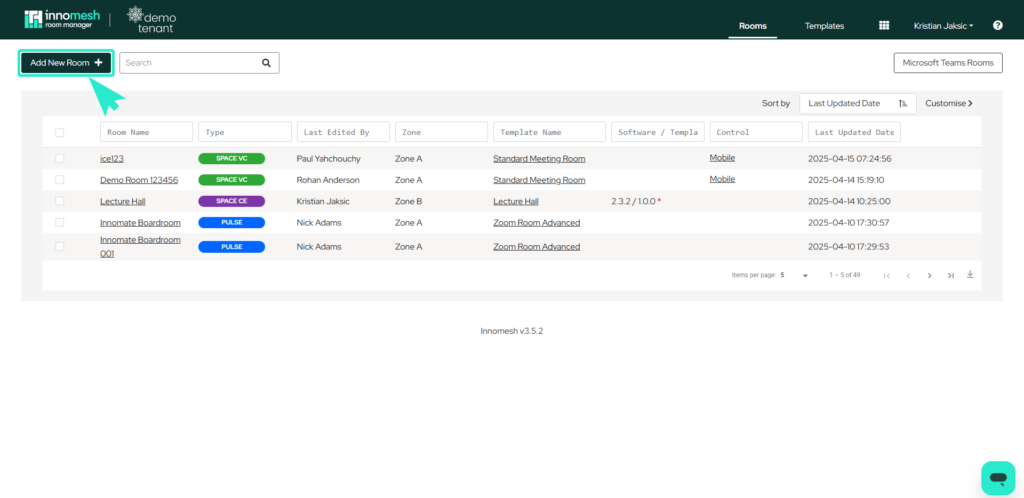
To create a new room, navigate to the Room manager home page and click on the “Add New Room” button shown below.
Now a template must be selected that suits your requirements. Once a viable one has been selected, click “Next” at the bottom right of the window.
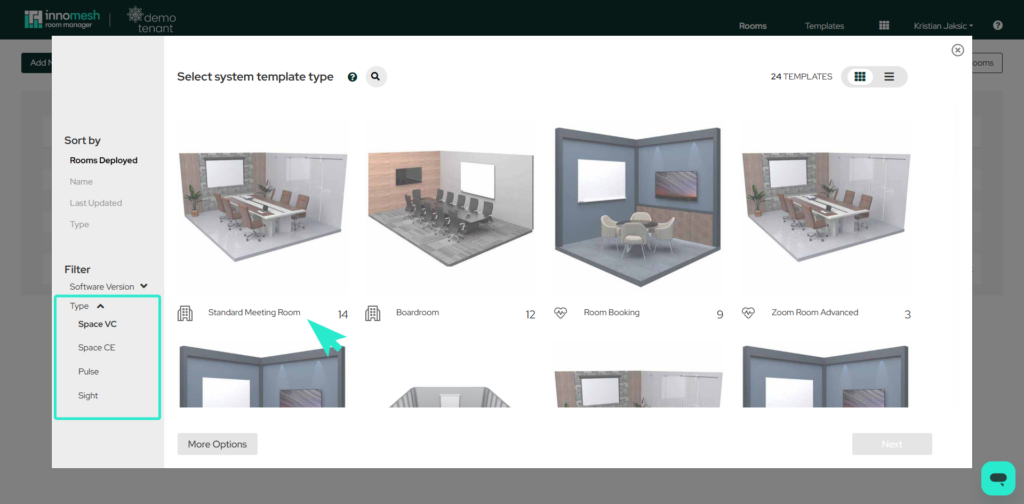
Please note that you may filter your template view by browsing “Type” drop down menu and selecting Space VC.
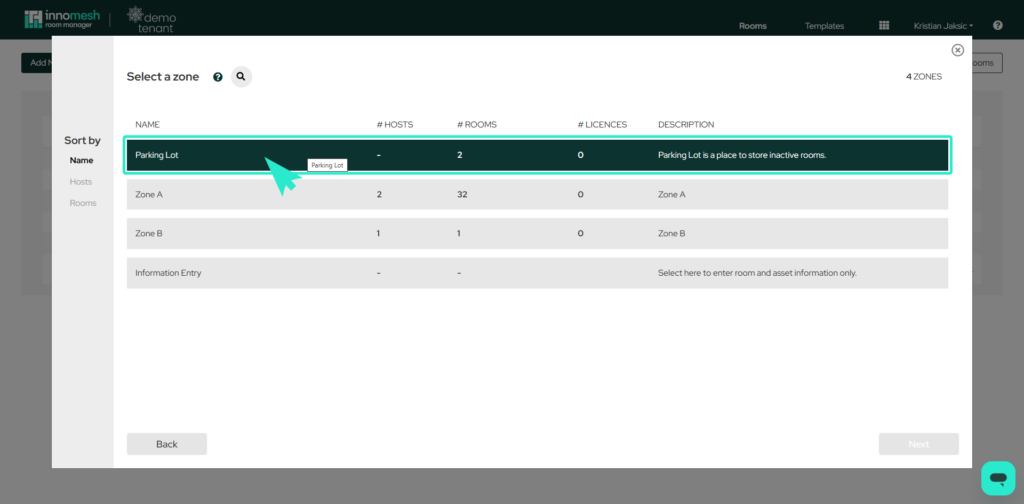
The next step is to select the Zone where you want to set your room up. You have the ability to move the room across to a different zone so the best practice would be to stand a room in a zone that is used for testing purposes before it is being moved across to the production environment.
For more information about Zones, see Innomesh Administration page here.
Select from the list of Zones and click “Next” in the bottom right corner of the window.
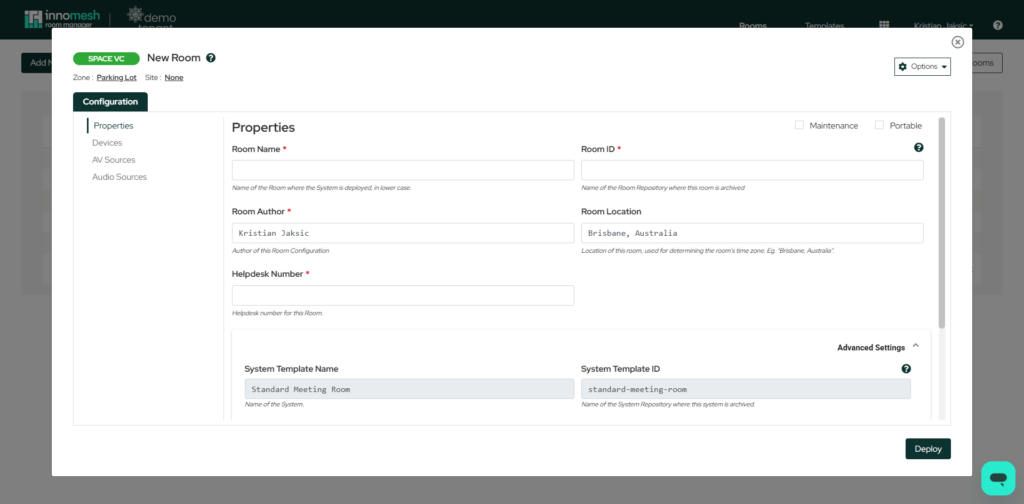
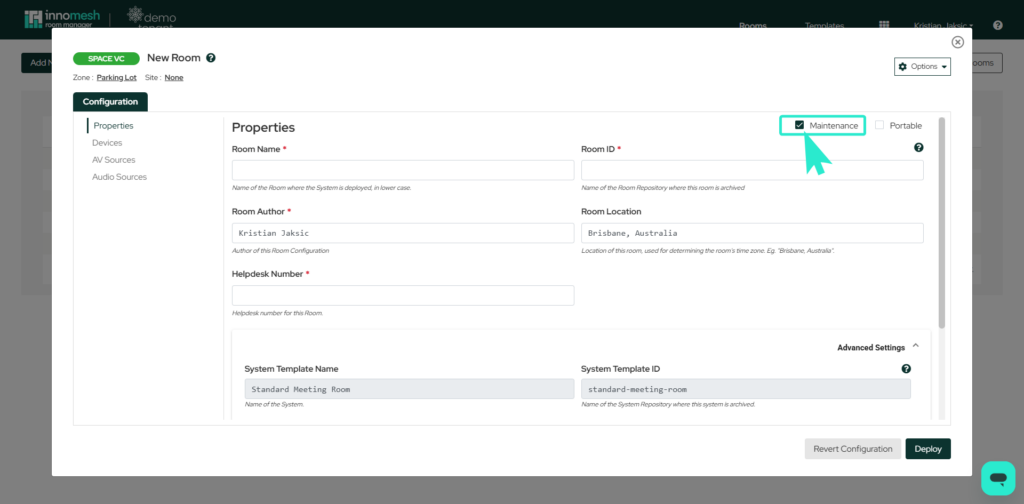
Properties
The room creation process has begun. The Room Name, Room Repository Name, Helpdesk Number and Room Author fields must now be populated.
Devices
The device information must now be populated.
Native
The first devices that need to be populated are the Crestron ‘Native’ devices. This information has been pulled from the template, so the IPIDs of the devices are already populated. If this information is correct, the process can continue. Otherwise, each device can be edited, duplicated or deleted by hovering over the device and clicking on the icons.
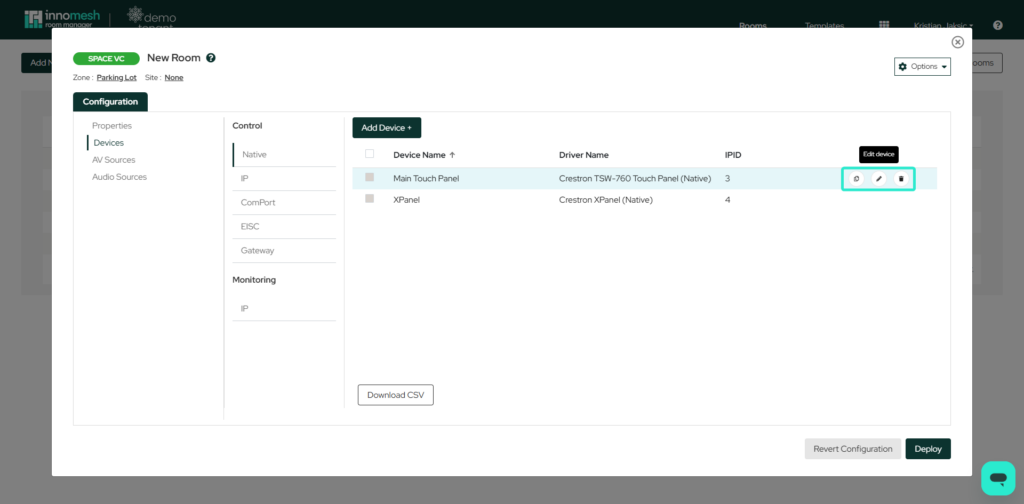
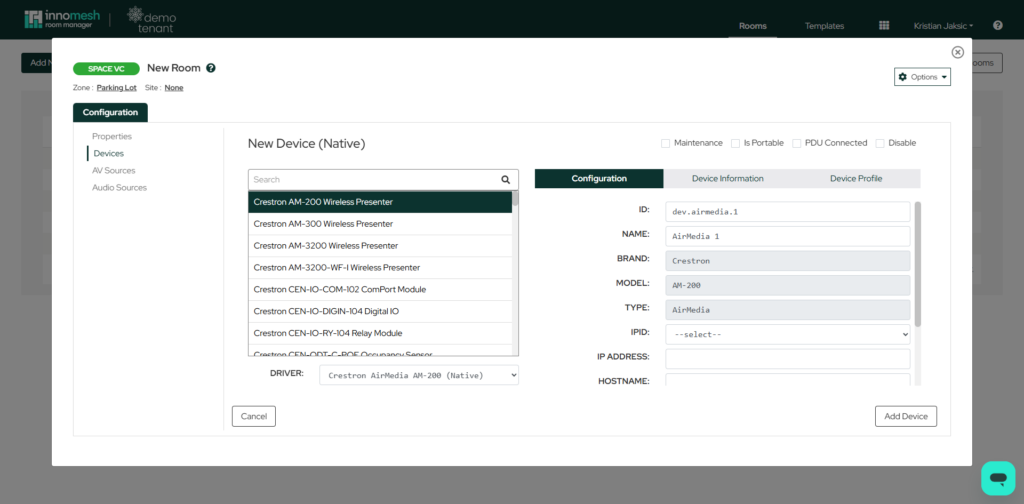
To change any of the above fields, or disable the device, click on the pencil icon highlighted above, and edit the device.
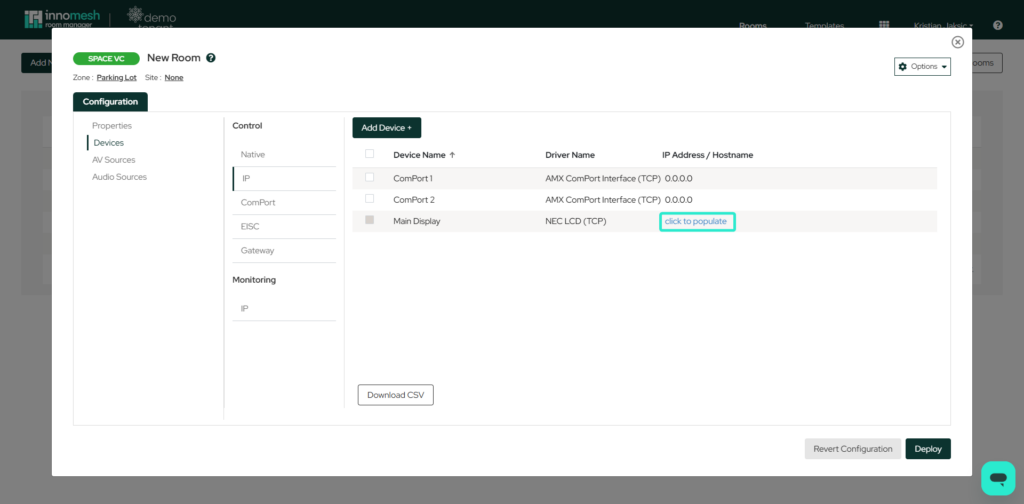
IP
The IP device Hostname/IP addresses must now be populated. To populate this information, simply click on the “Click to Populate” button.
Once again, the device can be duplicated, edited and deleted by clicking on the three icons to the right of the IP address.
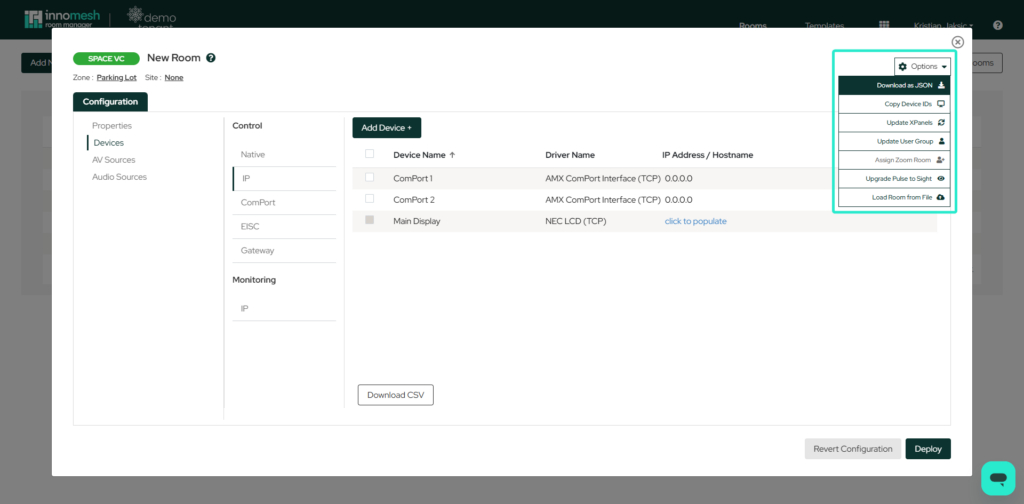
You may also have noticed the options dropdown menu on the top right, which provides access to several useful features for the current Space VC room.
- Download as .JSON: Downloads the current Space VC room’s settings as a .json file. A .json file will immediately download and contain fields respective to your Space VC room.
- Copy Device IDs: Provides the option to copy a particular device ID of a device linked to the current Space VC room. A dropdown menu will appear with a list of devices connected to the current Space VC room, and will copy the device ID to your clipboard of the device that you select. You will also see a notification on your screen to notify you that this device ID has been copied to your clipboard.
- Update XPanels: Updates all XPanels which are connected to the current Space VC room, as XPanels will not receive room changes automatically.
- Update User Group: Update User Group lets you assign or modify user groups for a room, helping manage access and permissions quickly and efficiently.
- Assign Zoom Room: Associates a zoom room that has been detected by Innomesh to an Innomesh room configuration. Both rooms will now become one, and alerts associated with the zoom room will appear against the Innomesh room in the Hotlist.
- Upgrade Pulse to Sight: Clicking on this option will change the monitoring component of the room from Pulse to Sight. Pulse will only check whether the device is on/offline whereas Sight will collect more detailed insights into the devices.
- Load Room From File: Allows the user to upload a room via a JSON and or a ZIP file, which will upload a configuration as well as Space and Pulse devices, if defined.
If the information that is entered is now correct, the room can be created by clicking on the “Create” button at the bottom right corner of the window.
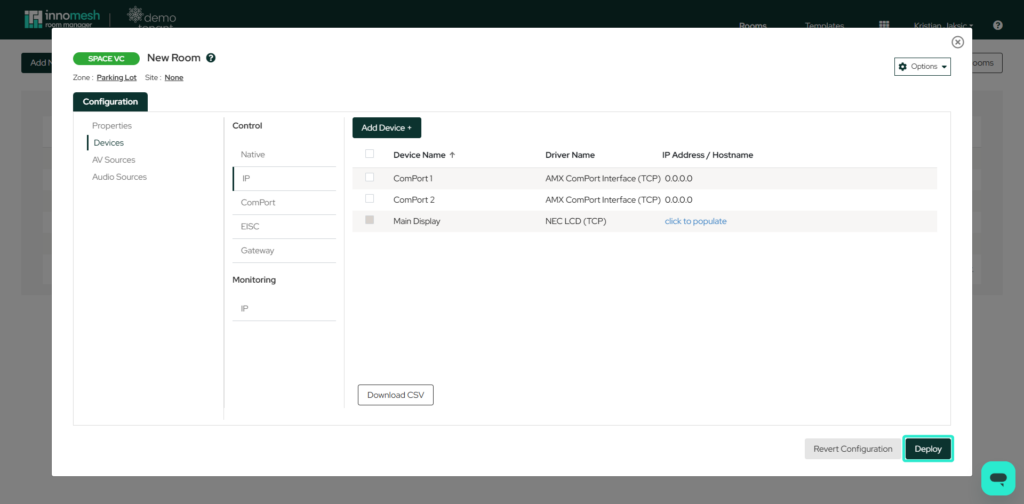
The room will now be deployed.